How to Create a Private Email Address for a Custom Domain Using Proton Mail and Cloudflare
Creating a private email address for a custom domain using Proton Mail is a great way to enhance your privacy while maintaining a professional appearance.
Introduction
In today’s digital age, privacy and security are paramount. With data breaches and privacy concerns on the rise, many individuals and businesses are seeking ways to protect their online communications. Proton Mail, known for its robust encryption and privacy features, offers a solution for those looking to create a private email address using their custom domain. In this blog post, I will guide you through the steps to set up your secure email address via Proton Mail.
Why Choose Proton Mail?
- End-to-End Encryption: Proton Mail employs end-to-end encryption, ensuring that only you and your intended recipient can read your emails.
- Privacy-Focused: Based in Switzerland, Proton Mail is protected by strict Swiss privacy laws.
- User-Friendly Interface: Despite its strong security features, Proton Mail offers an easy-to-use interface suitable for everyone.
Prerequisites
Before you start, ensure you have the following:
- A custom domain name (e.g., your_domain.com)
- A Proton Mail account (you can sign up for a free account, but you’ll need a paid plan to use a custom domain)
- Access to your domain’s DNS settings
Step-by-Step Guide
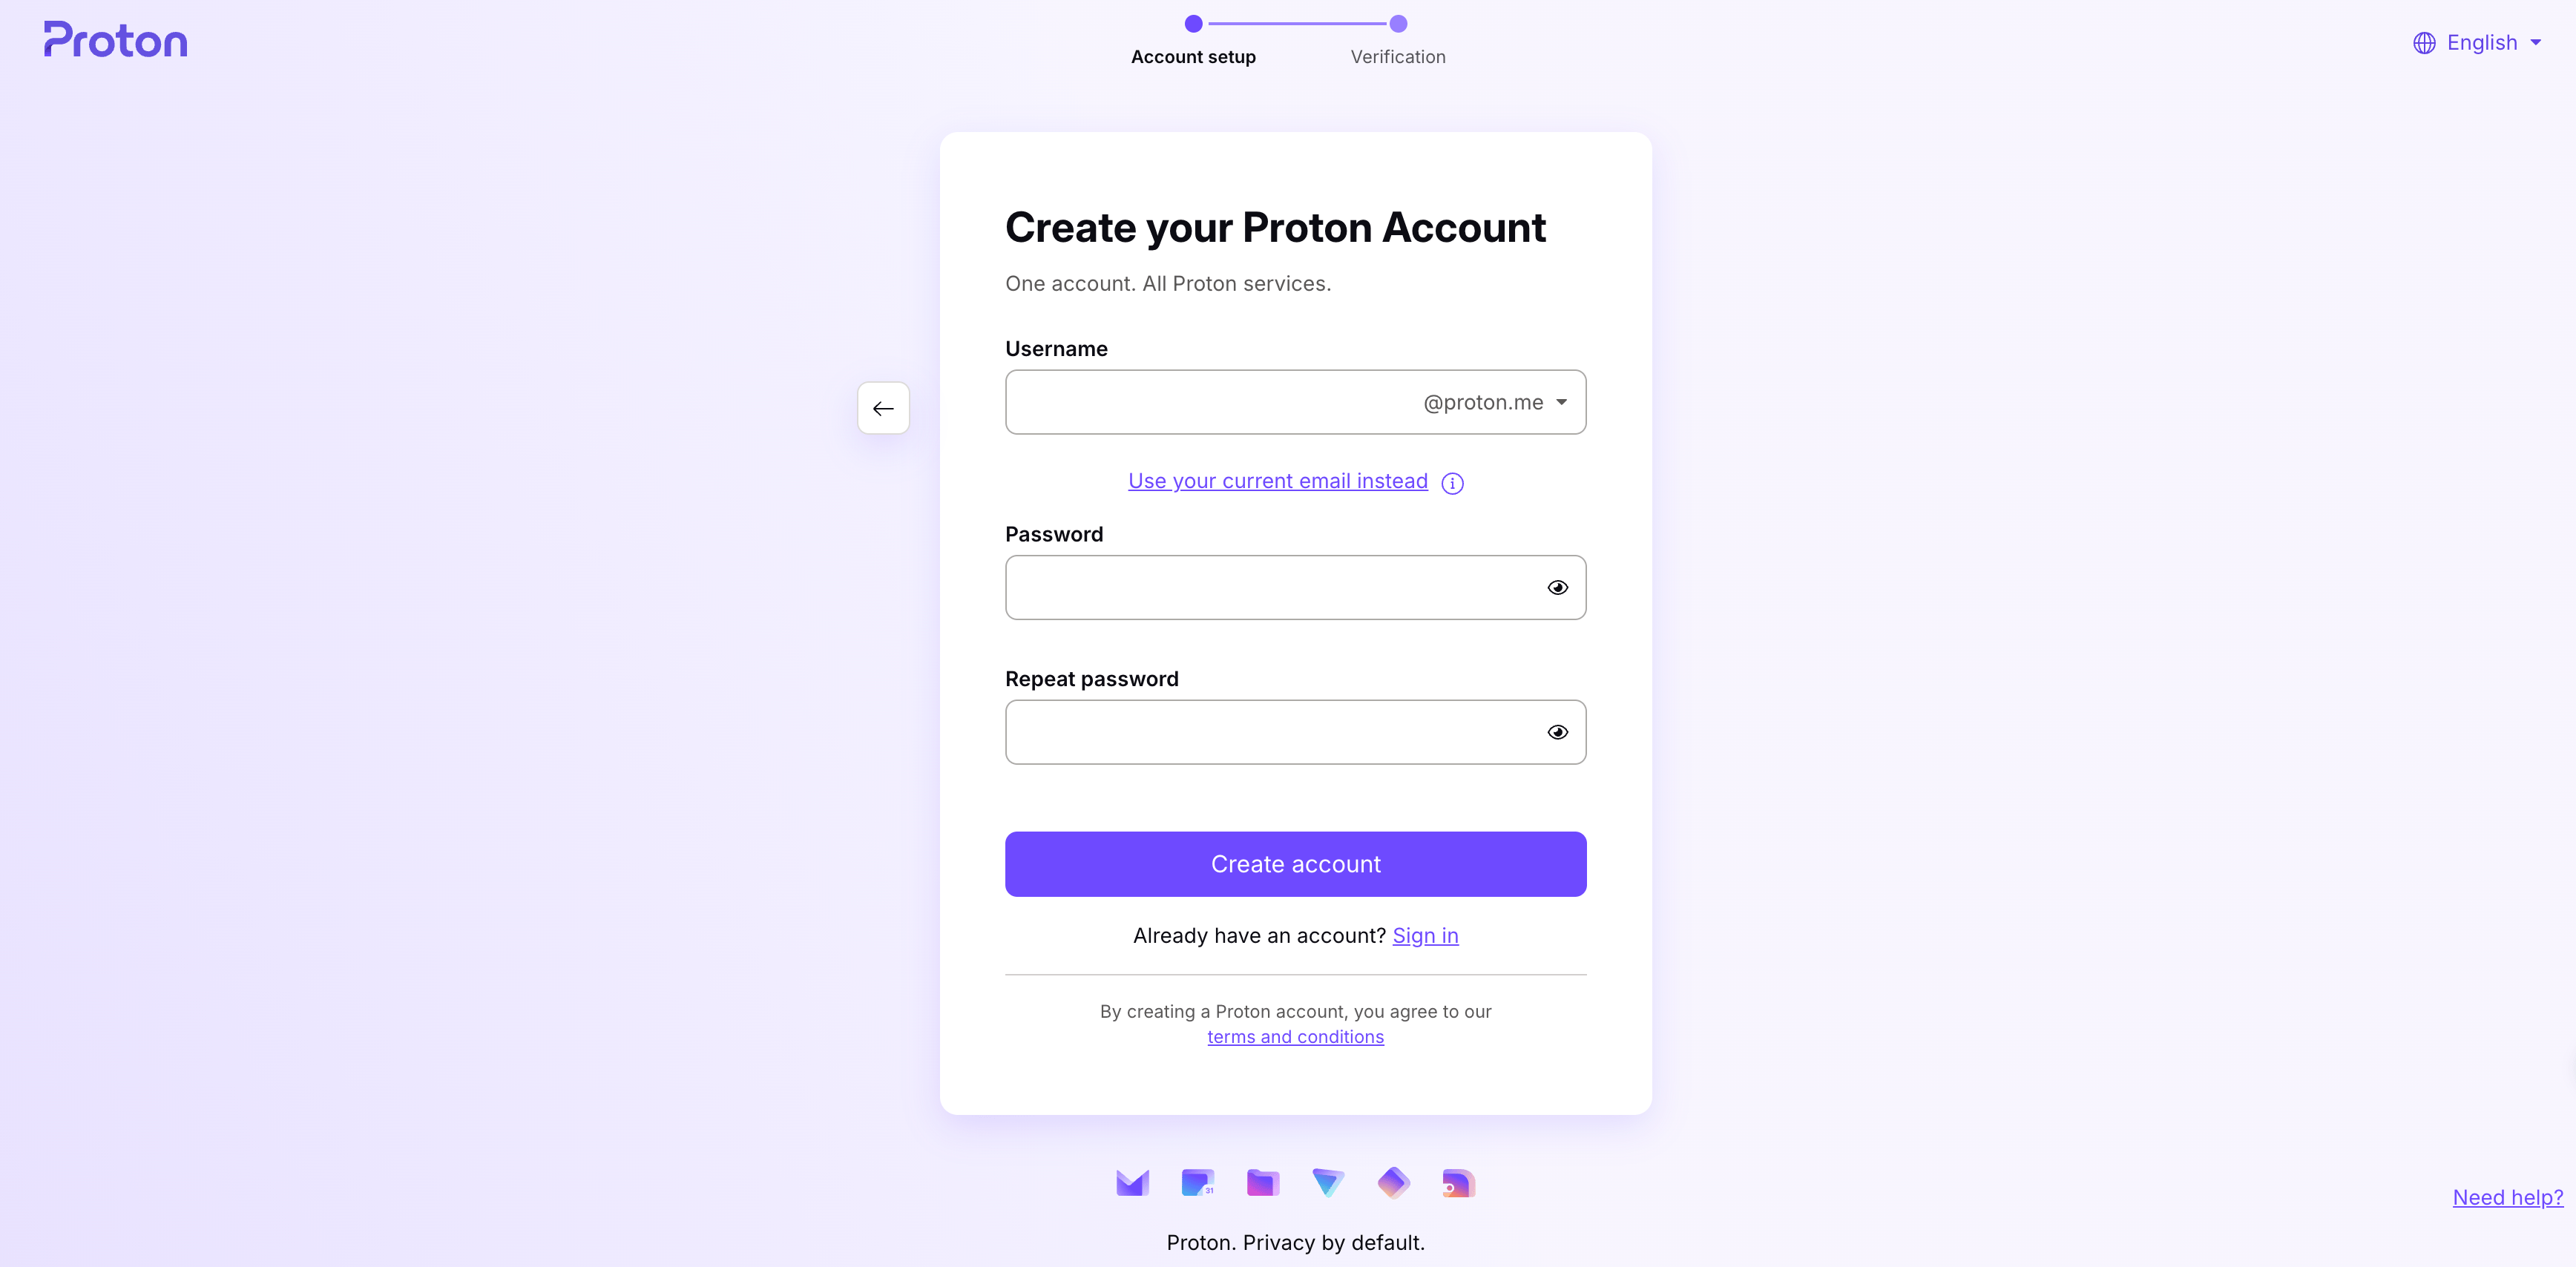
Step 1: Sign Up for Proton Mail
- Visit the Proton Mail website (Use this link to receive a free month of Mail+).
- Click on “Sign Up” and choose a plan that supports custom domains.
- Complete the registration process by following the on-screen instructions.
Step 2: Add Your Custom Domain
1.Log in to your Proton Mail account.
2.Navigate to Settings by clicking on the gear icon in the top right corner.

3.Select the Domain names tab on the left sidebar.
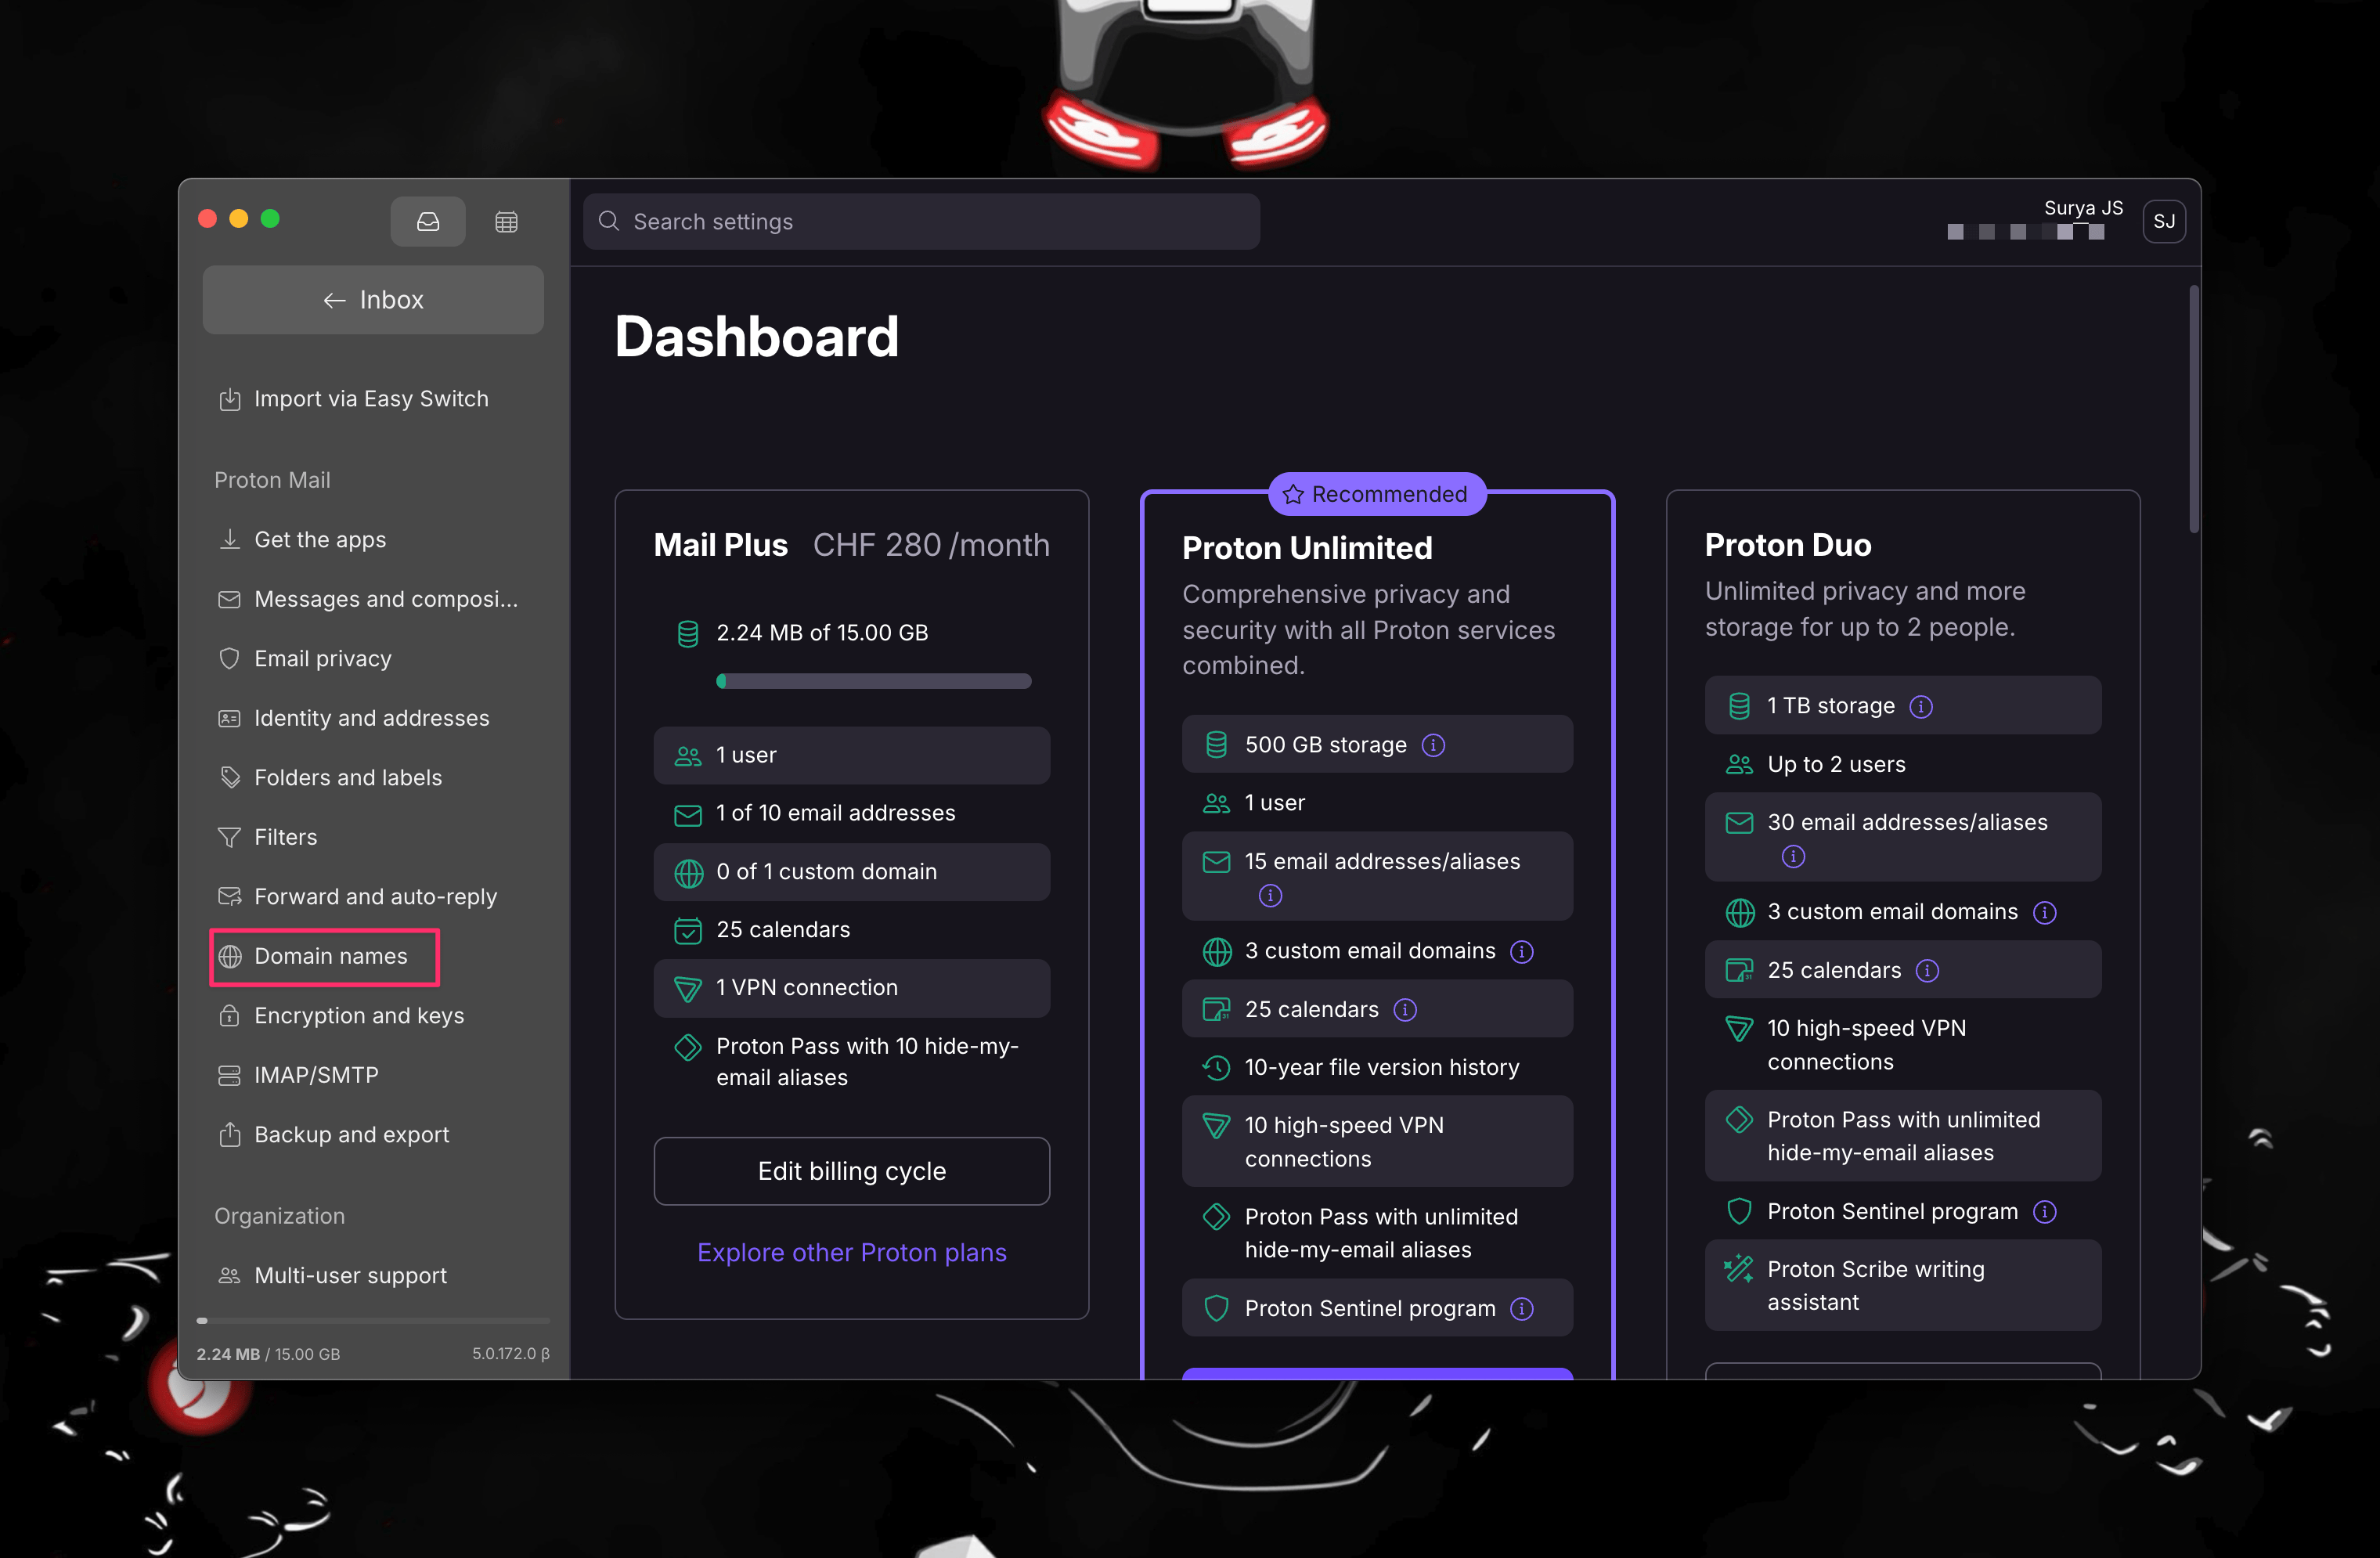
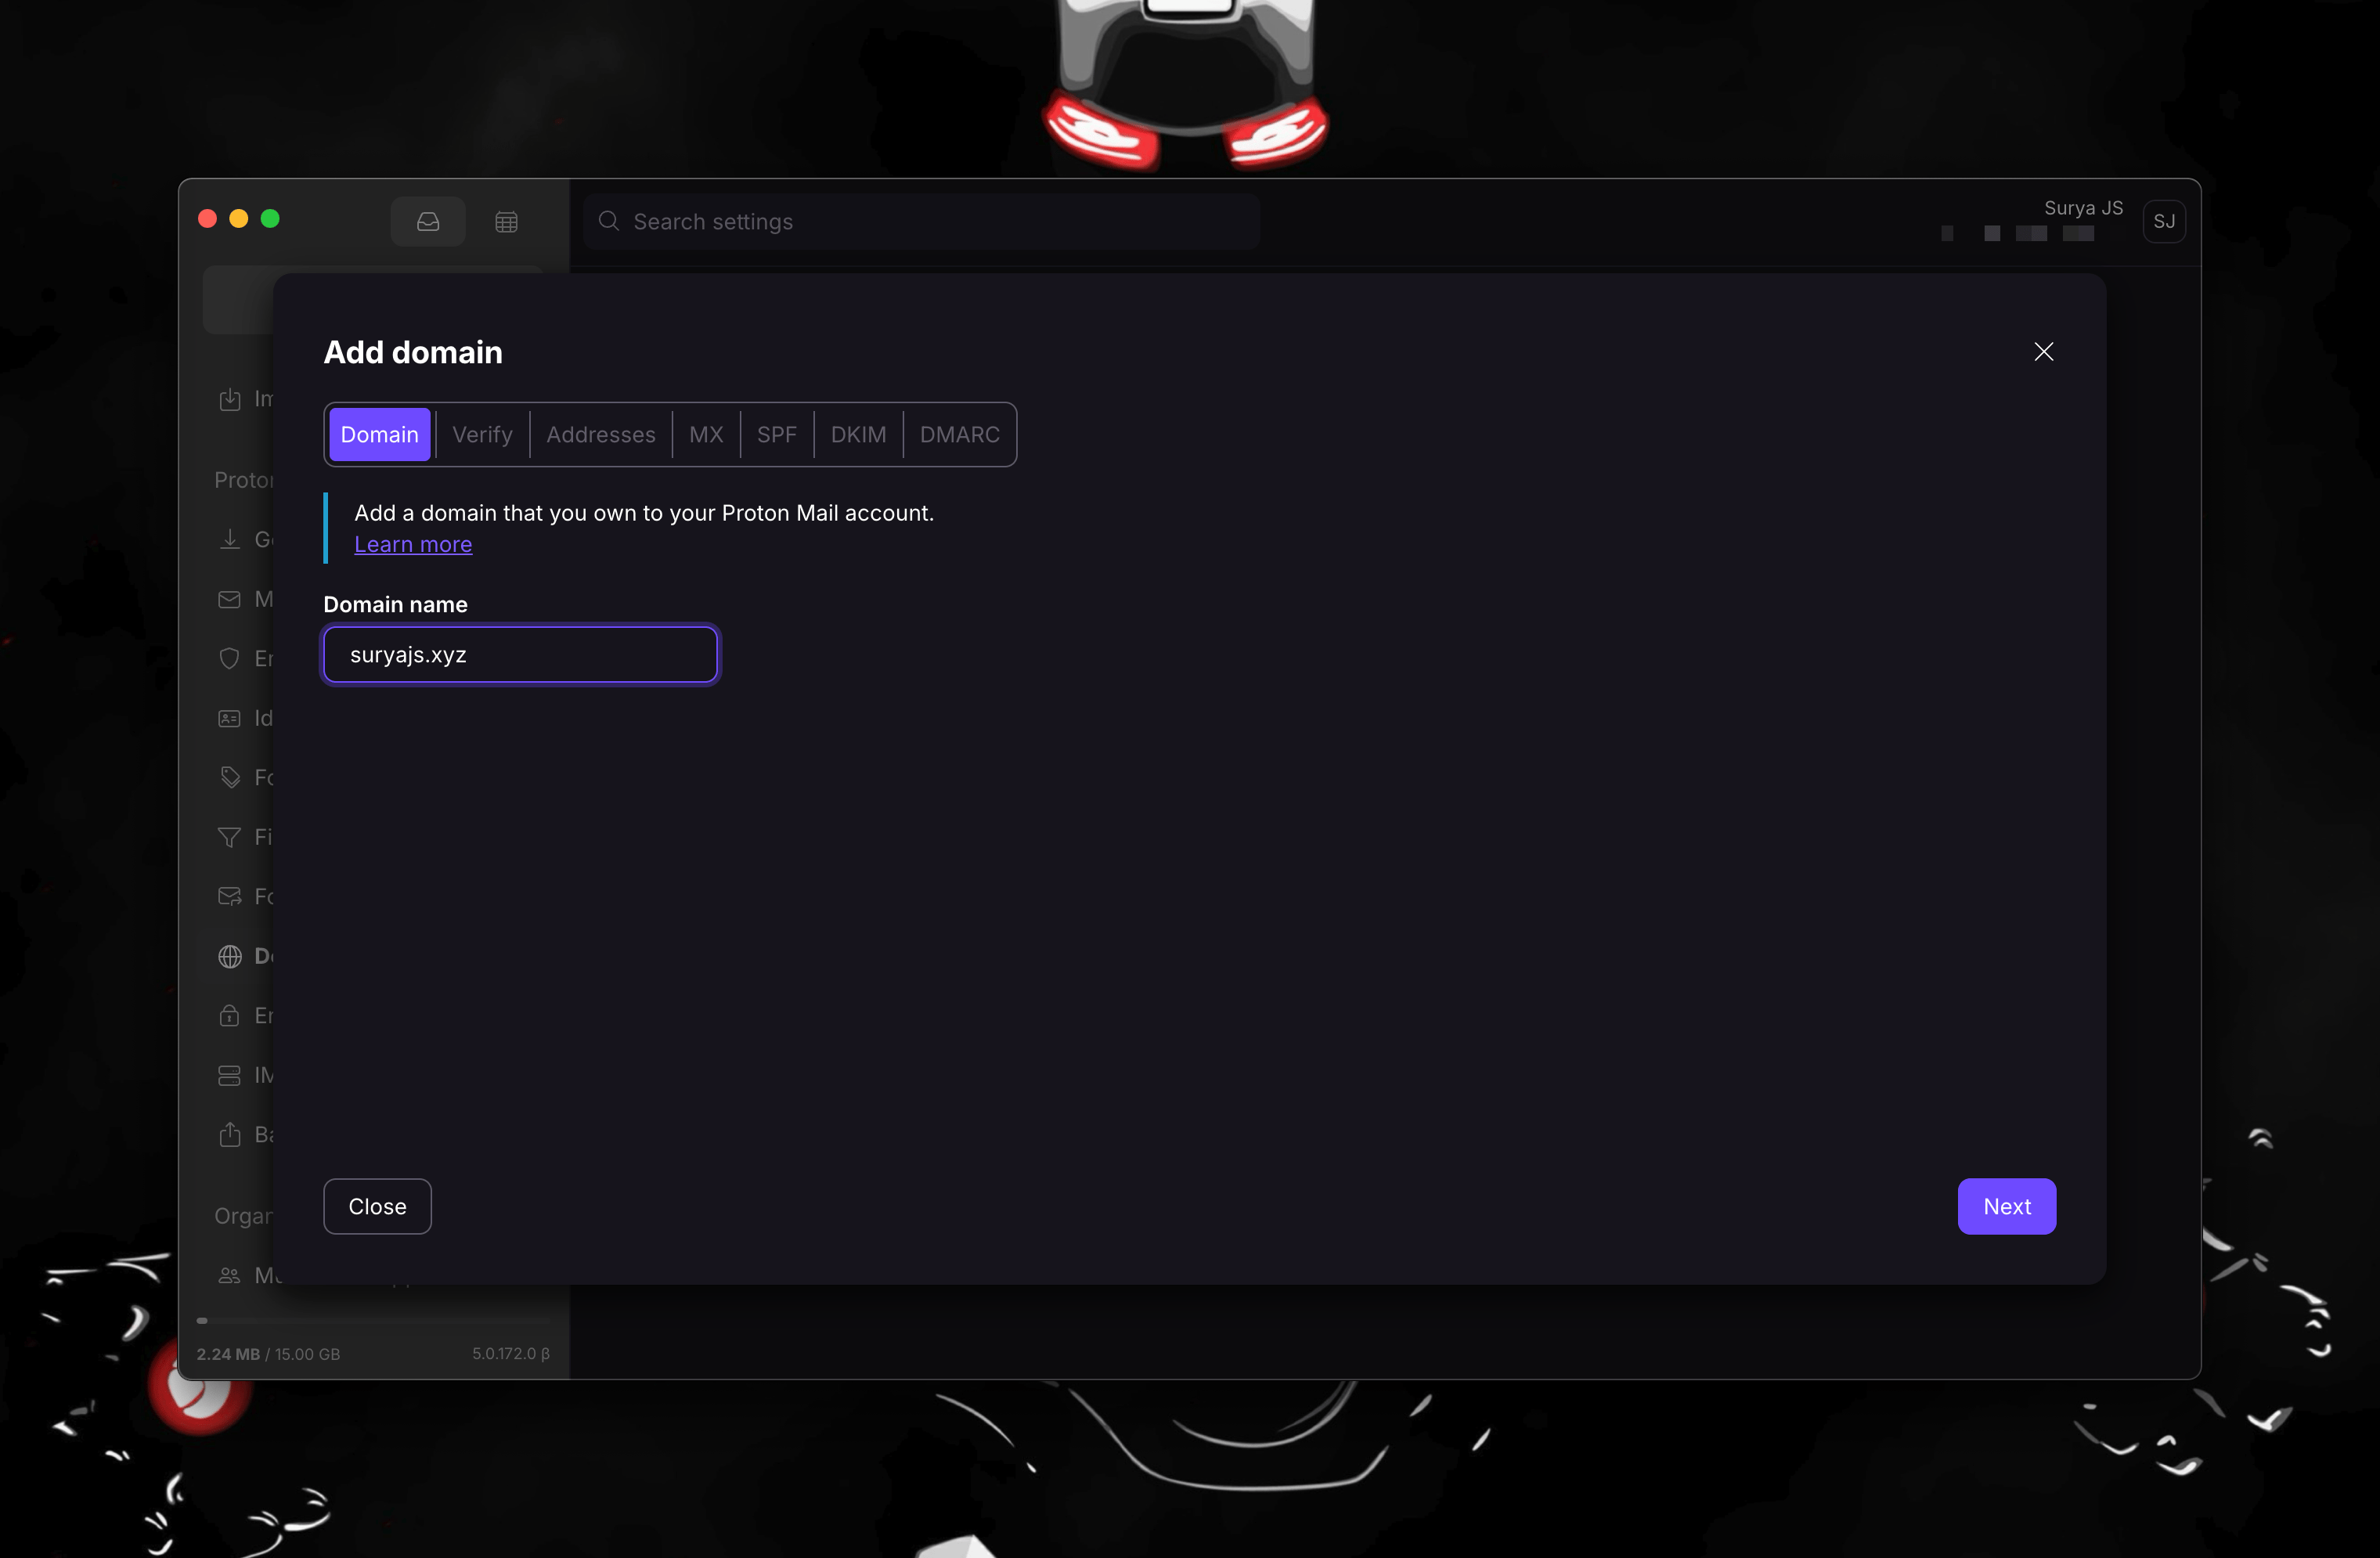
4.Click on Add Domain and enter your custom domain name (e.g., yourdomain.com).
5.After adding your domain, you will be prompted to enter your Proton Mail password for security verification. Enter your password and click Next to proceed.
Step 3: Verify Your Domain
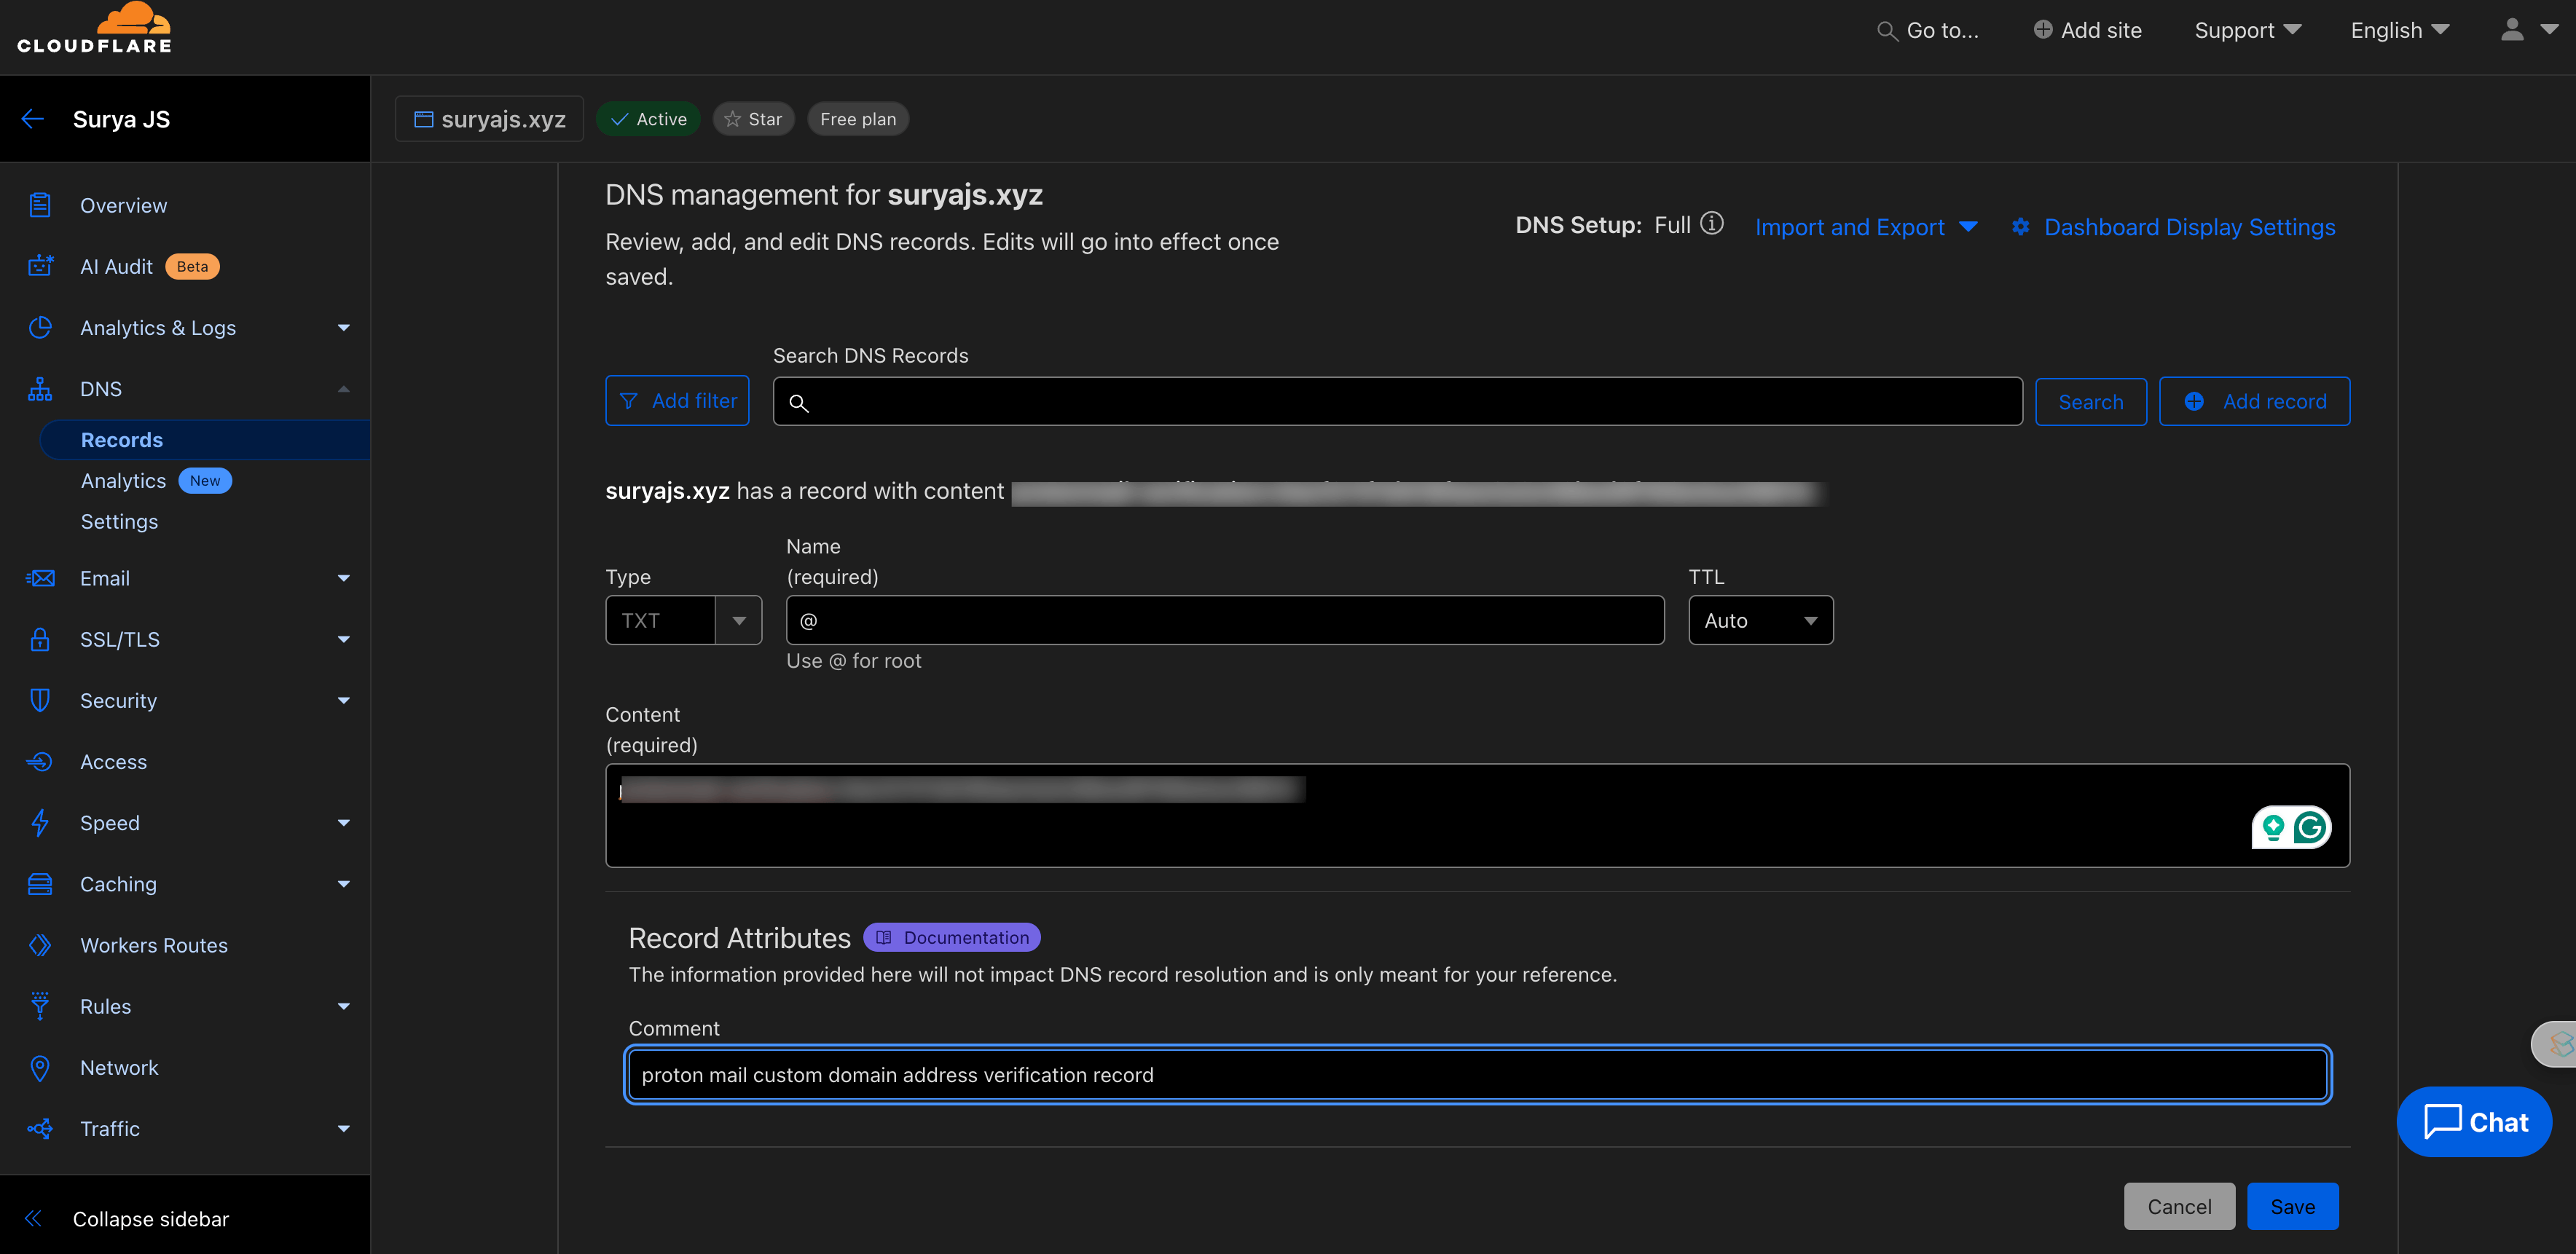
1.Proton Mail will provide you with a TXT record that you need to add to your domain’s DNS settings.
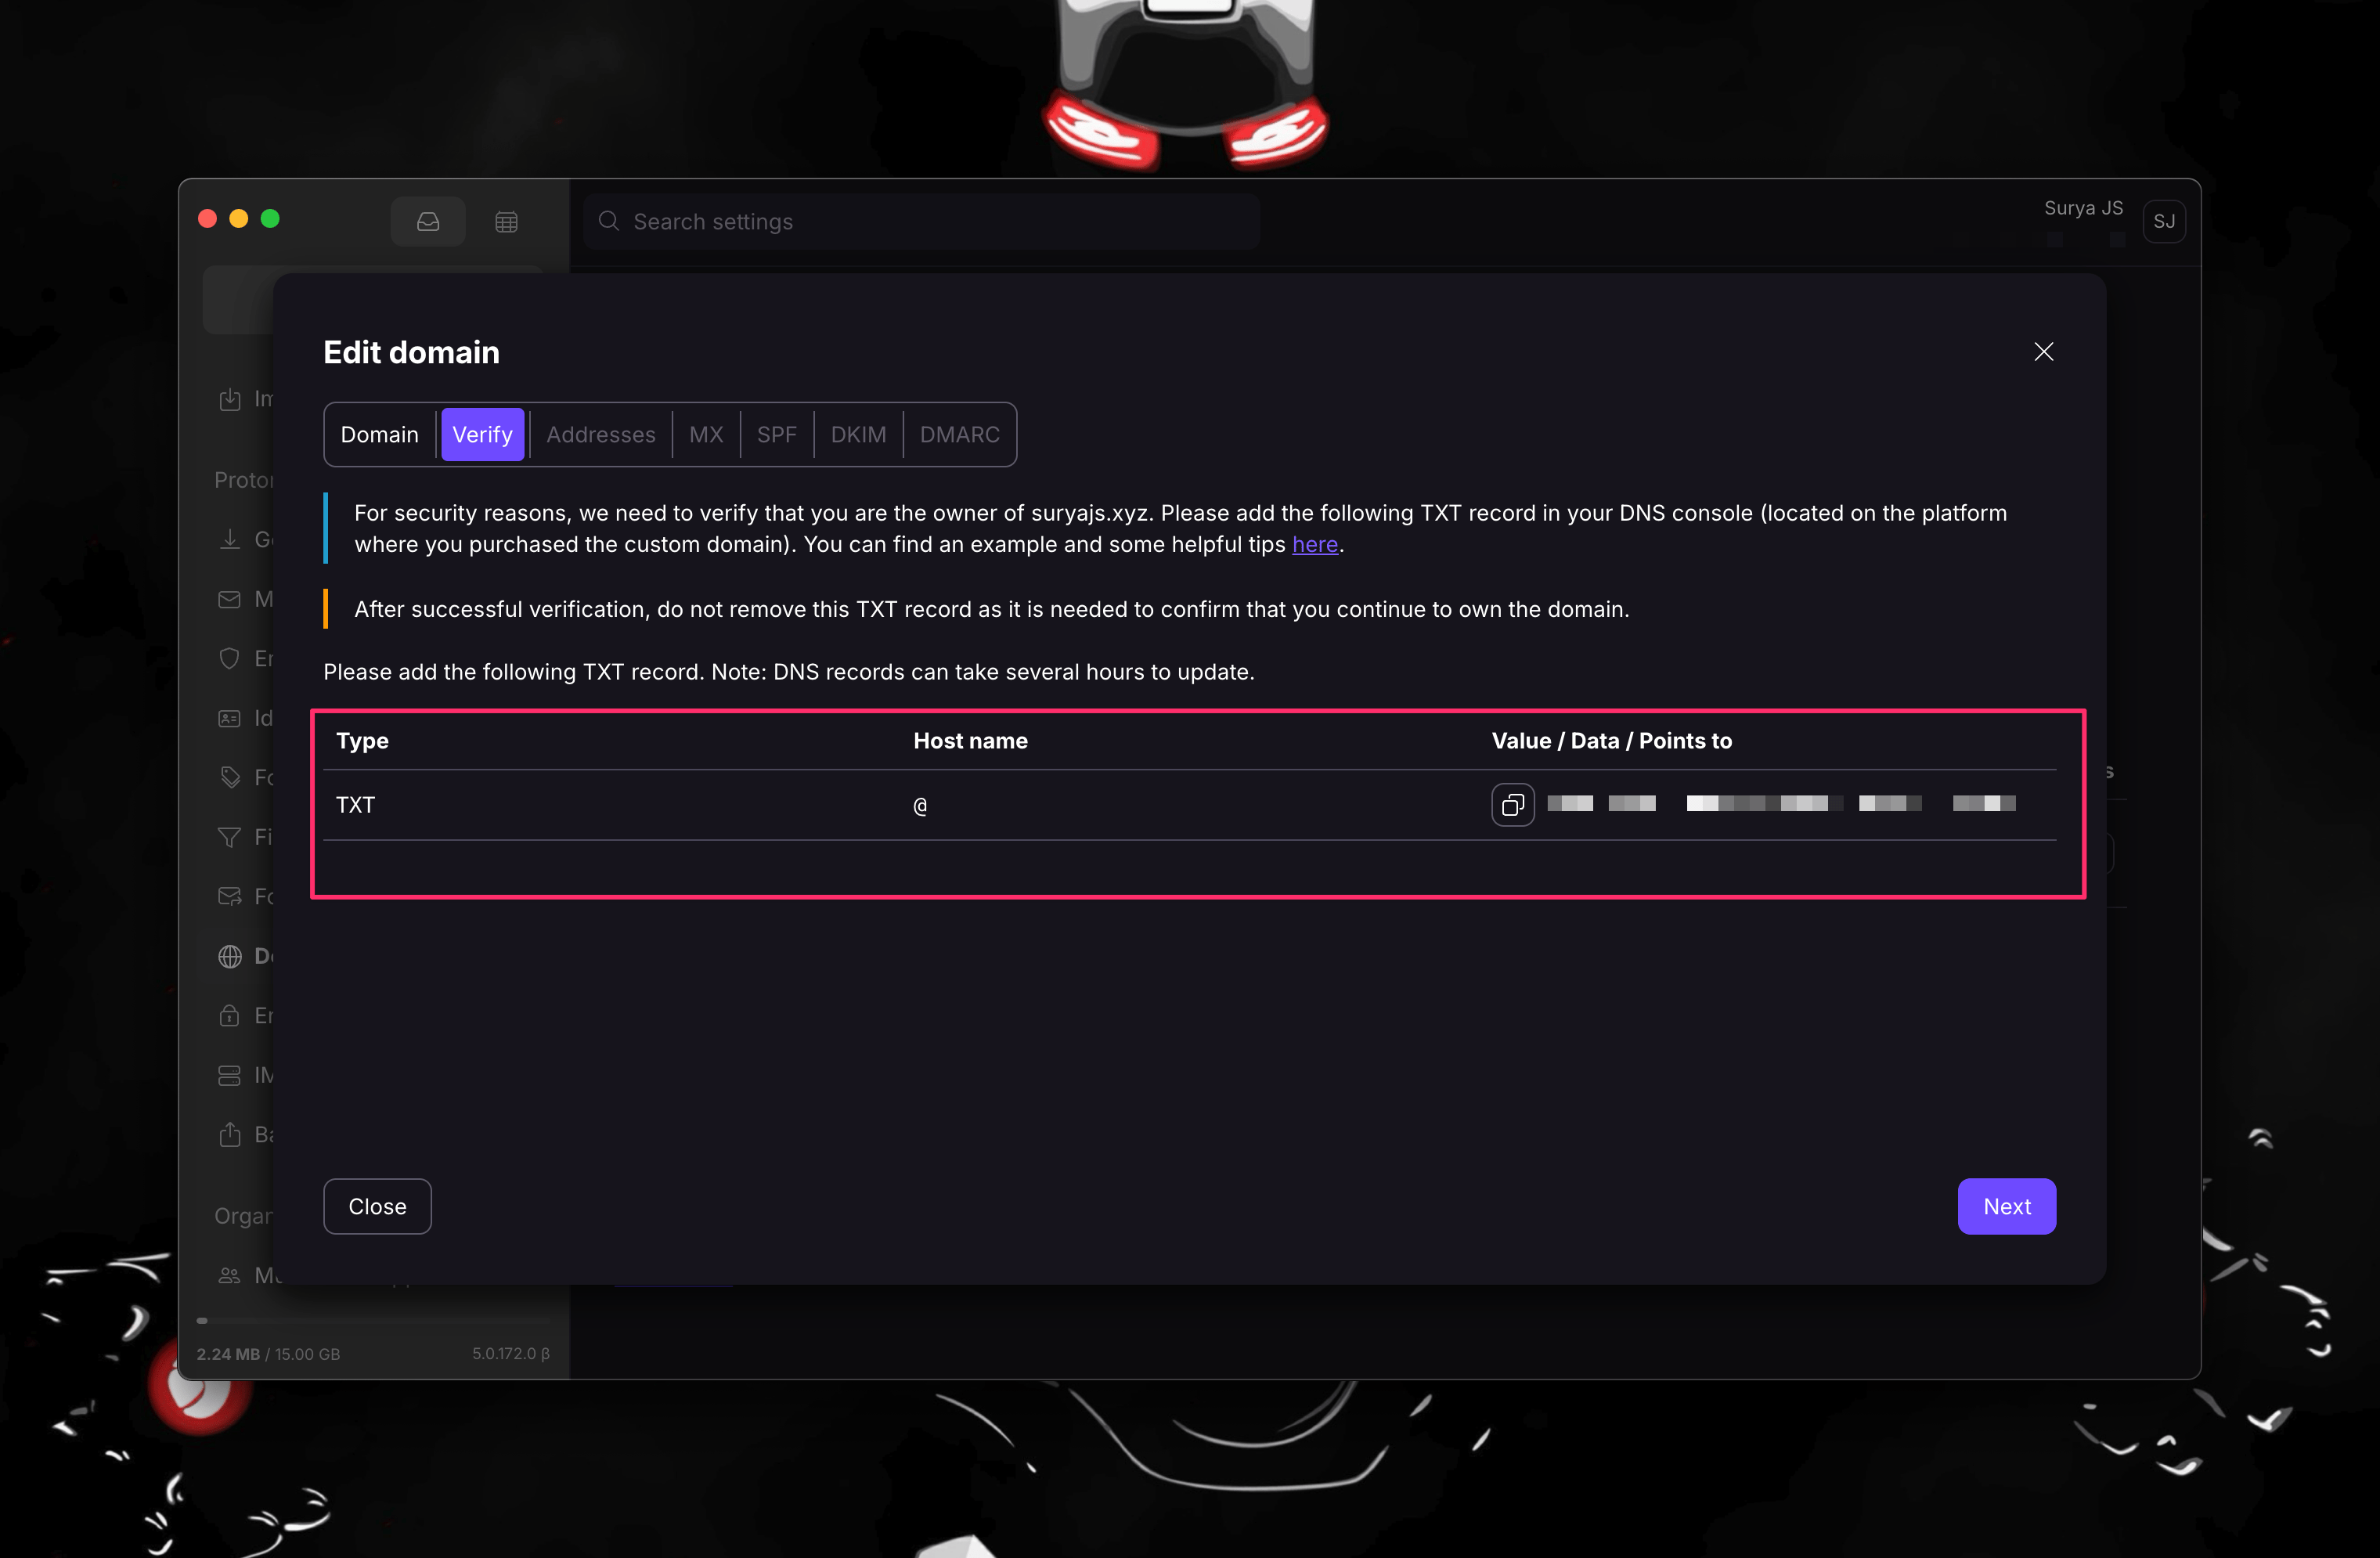
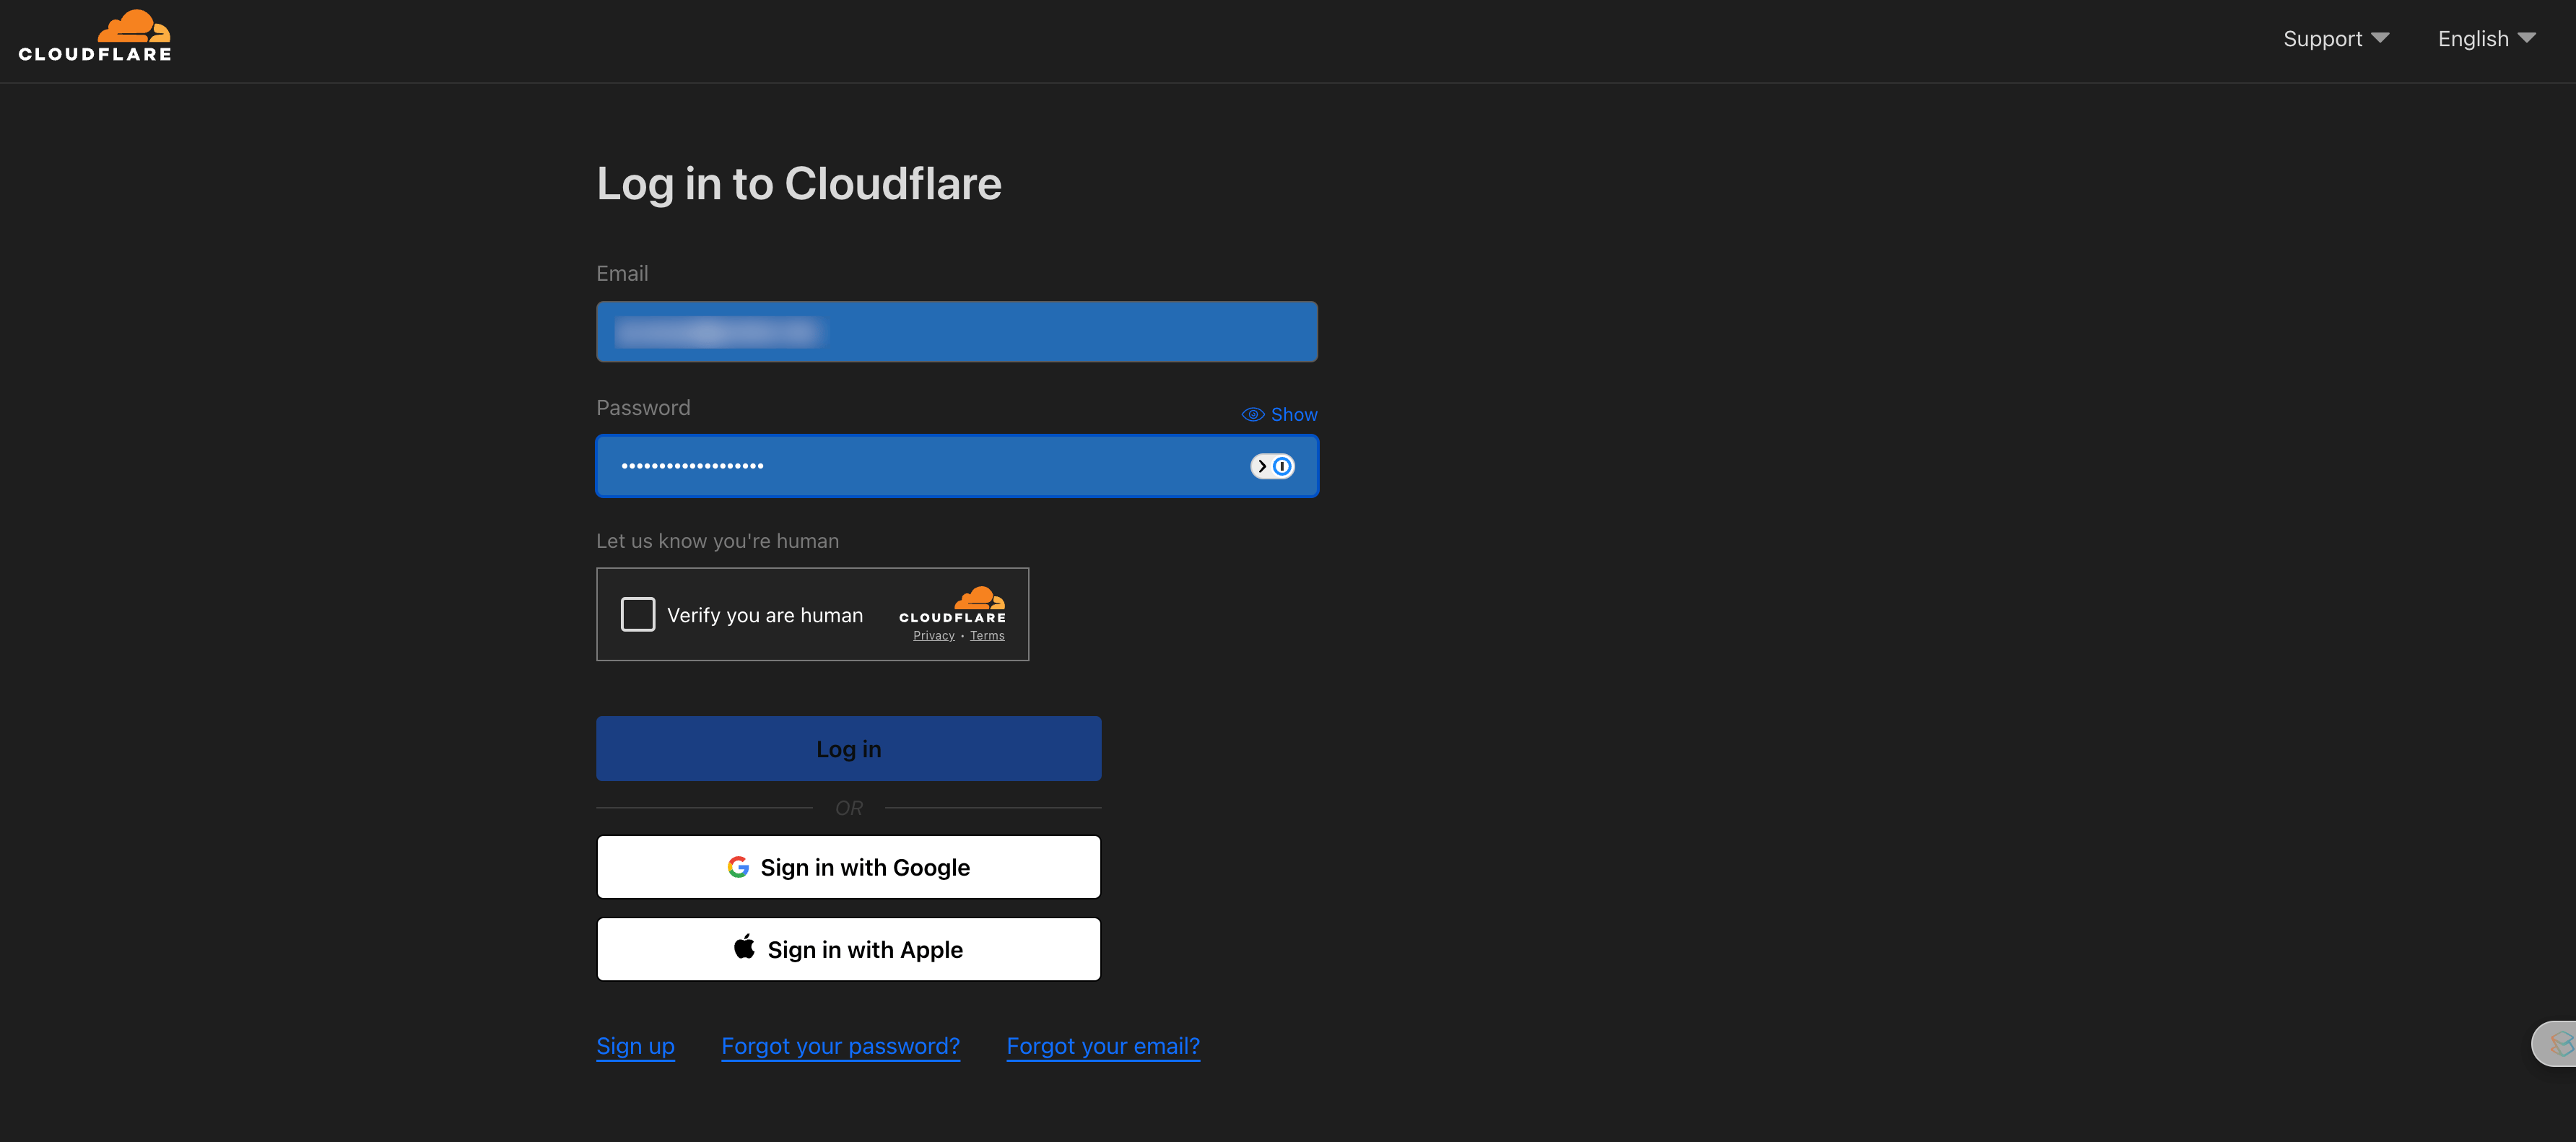
2.Log in to your domain registrar or Domain Hosting Provider (e.g., GoDaddy, Namecheap, Hostinger, Cloudflare).
3.Find the DNS management section and add the TXT record as provided by Proton Mail.
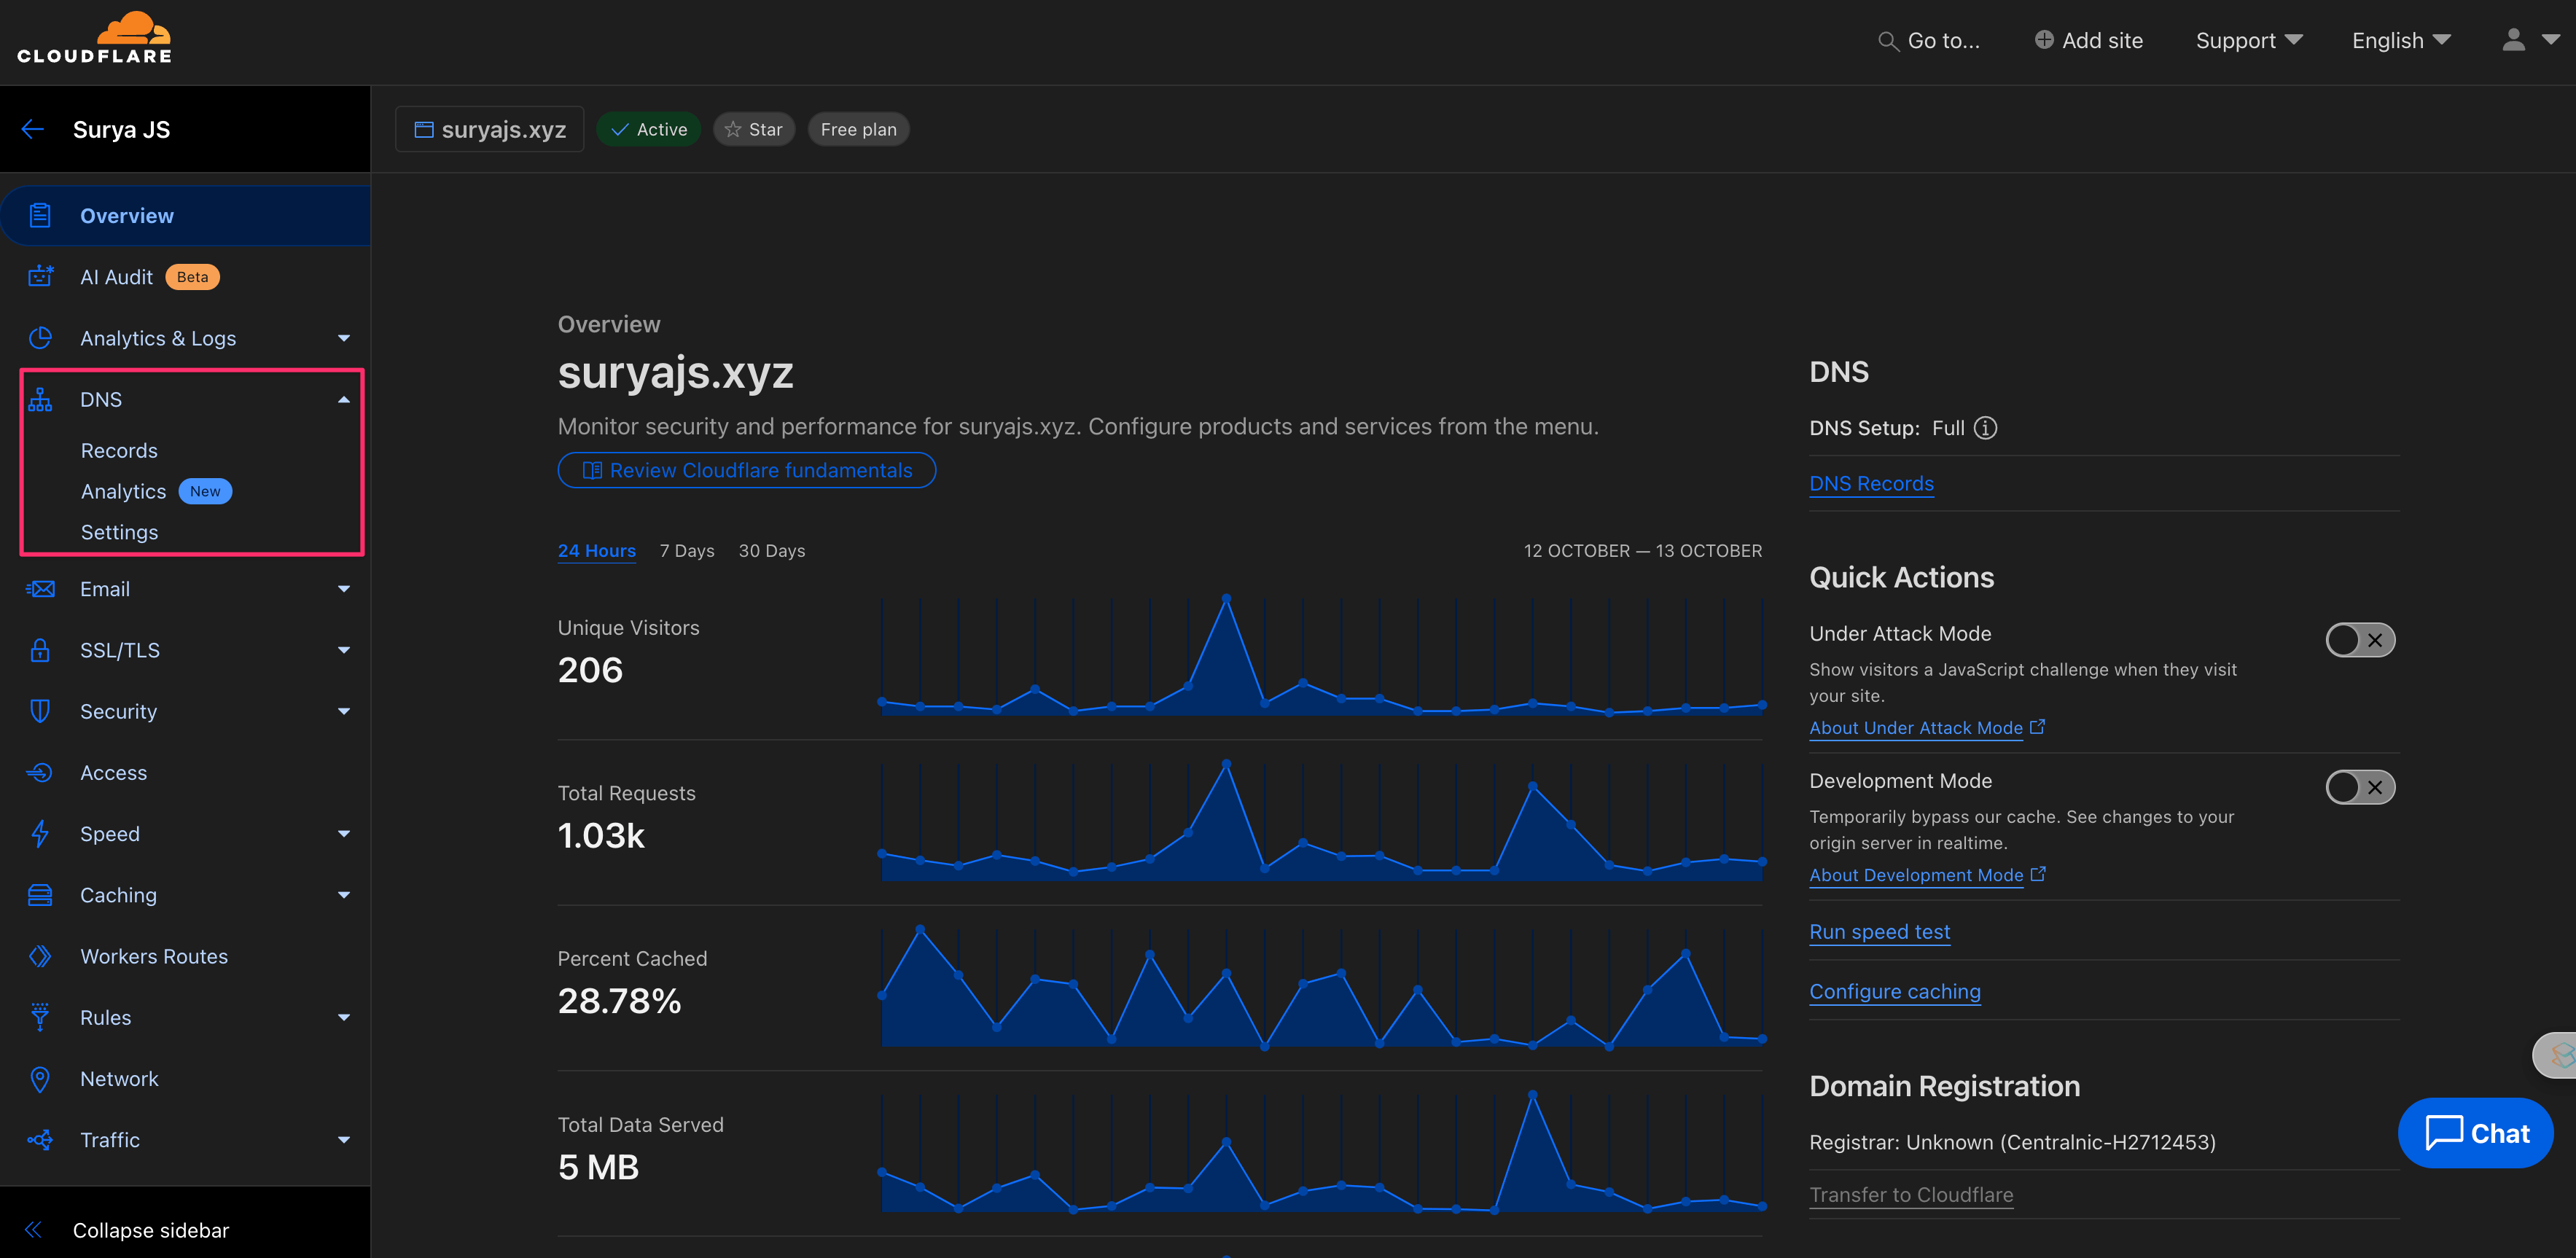 Click Records and add TXT record.

4.Return to Proton Mail and click Verify. It may take a few minutes for the changes to propagate.
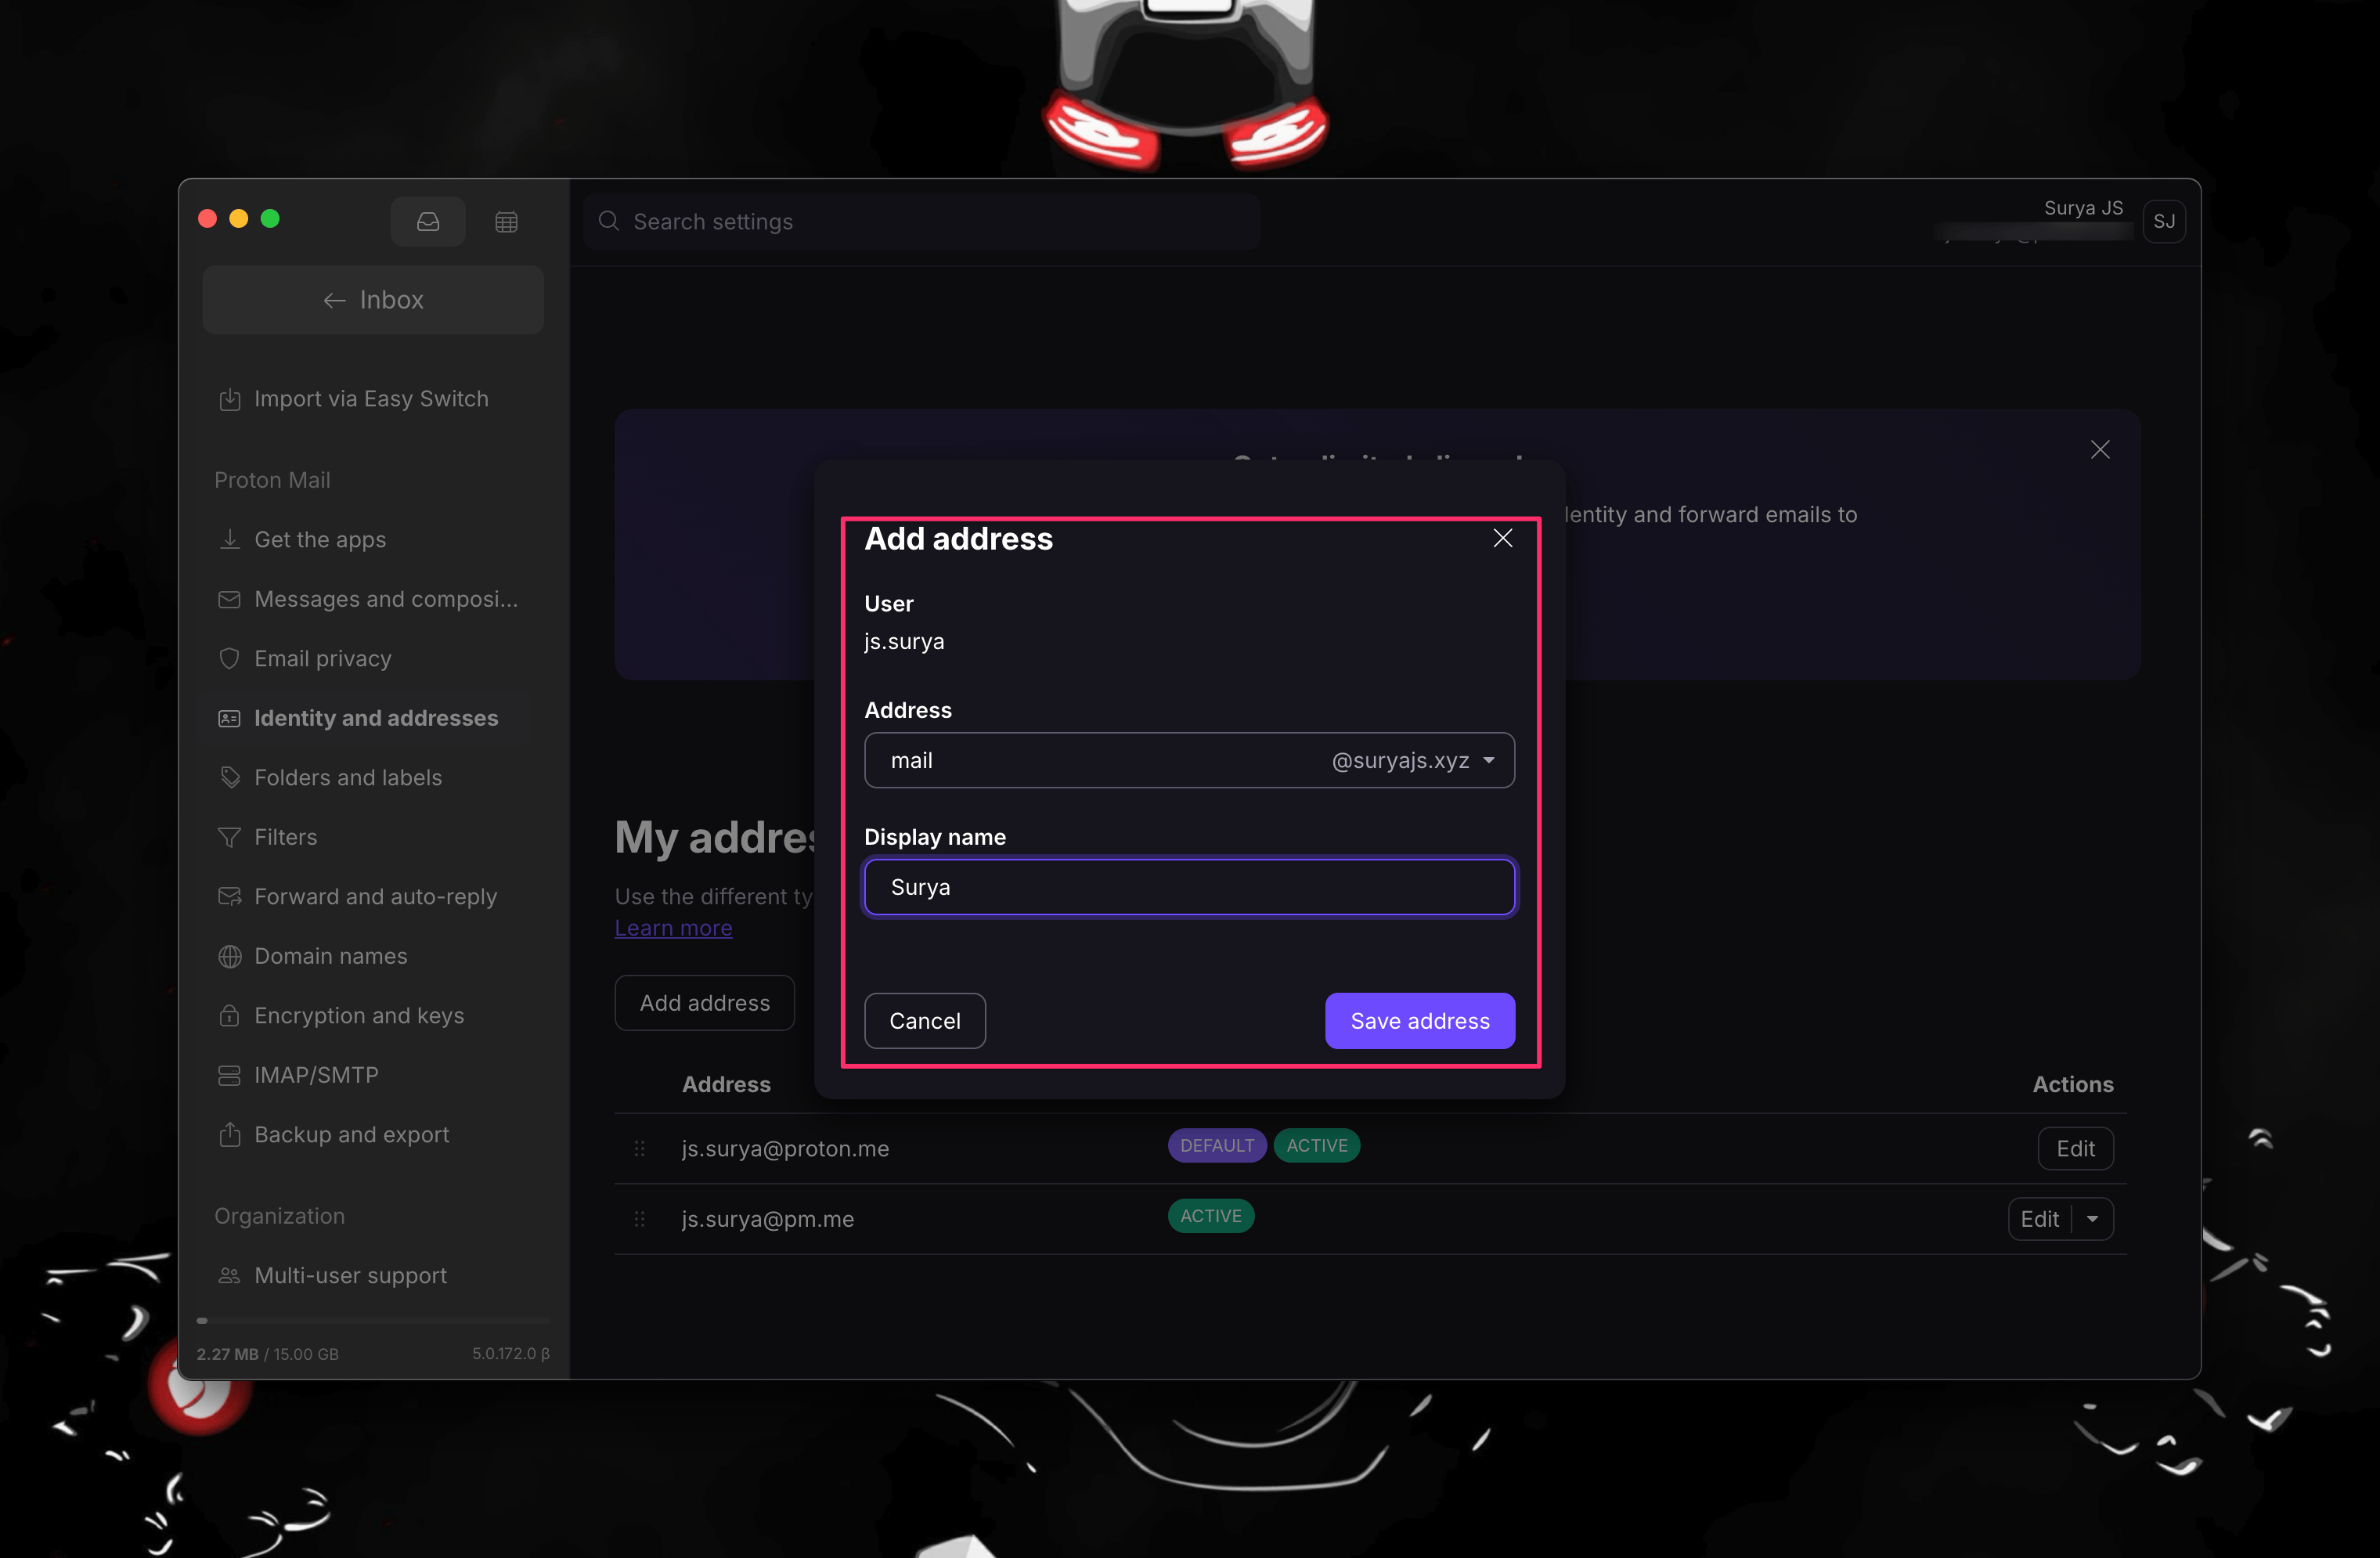
Step 4: Create Your Email Address
- Once your domain is verified, go back to the Domains section in Settings.
- Click on your custom domain to open its settings.
- Select Add Address to create your new email address (e.g., [email protected]).
- Fill in the required fields and click Save.
Step 5: Configure DNS Records for Email Delivery
After verifying your domain, it’s vital to configure the necessary DNS records to ensure that emails sent from your custom domain are delivered correctly and that your emails are authenticated. Follow these detailed steps to set up the required DNS records:
1. Access Your Domain Registrar’s DNS Settings
• Log in to your domain registrar’s website (e.g., Cloudflare, GoDaddy, Namecheap, Bluehost).
• Navigate to the section where you can manage your domain. This is usually labelled as “DNS Management,” “Domain Management,” or “DNS Settings.”
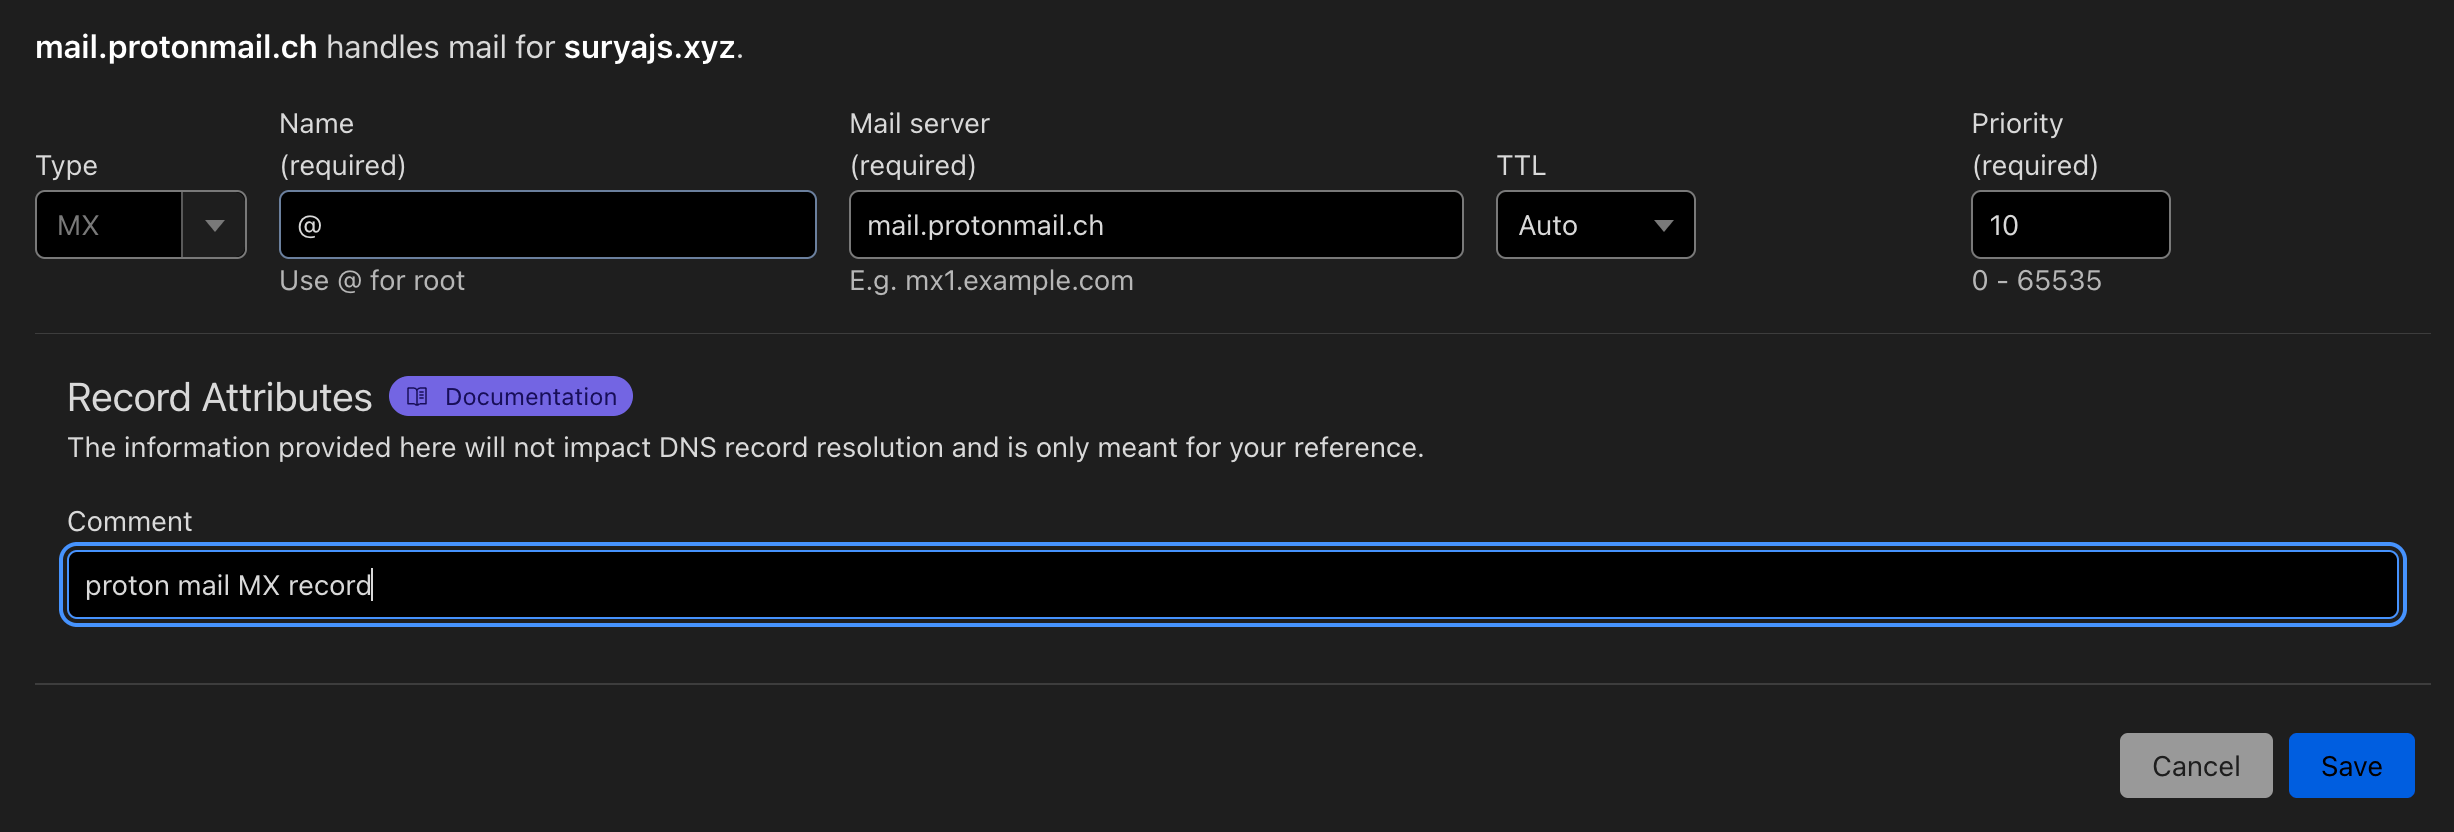
2. Add MX Records
MX (Mail Exchange) records are essential for directing email to your Proton Mail account.
• In the DNS settings, look for an option to add a new record.
• Select MX Record from the record type options.
• Enter the following details:
◦ Host/Name: Use “@” to represent your root domain (e.g., yourdomain.com).
◦ Value/Points to: Enter mail.protonmail.ch (for receiving emails)
◦ Priority: Set this to 10
• Add another MX record:
◦ Host/Name: Again, use “@” for your root domain.
◦ Value/Points to: Enter mailsec.protonmail.ch
◦ Priority: Set this to 20
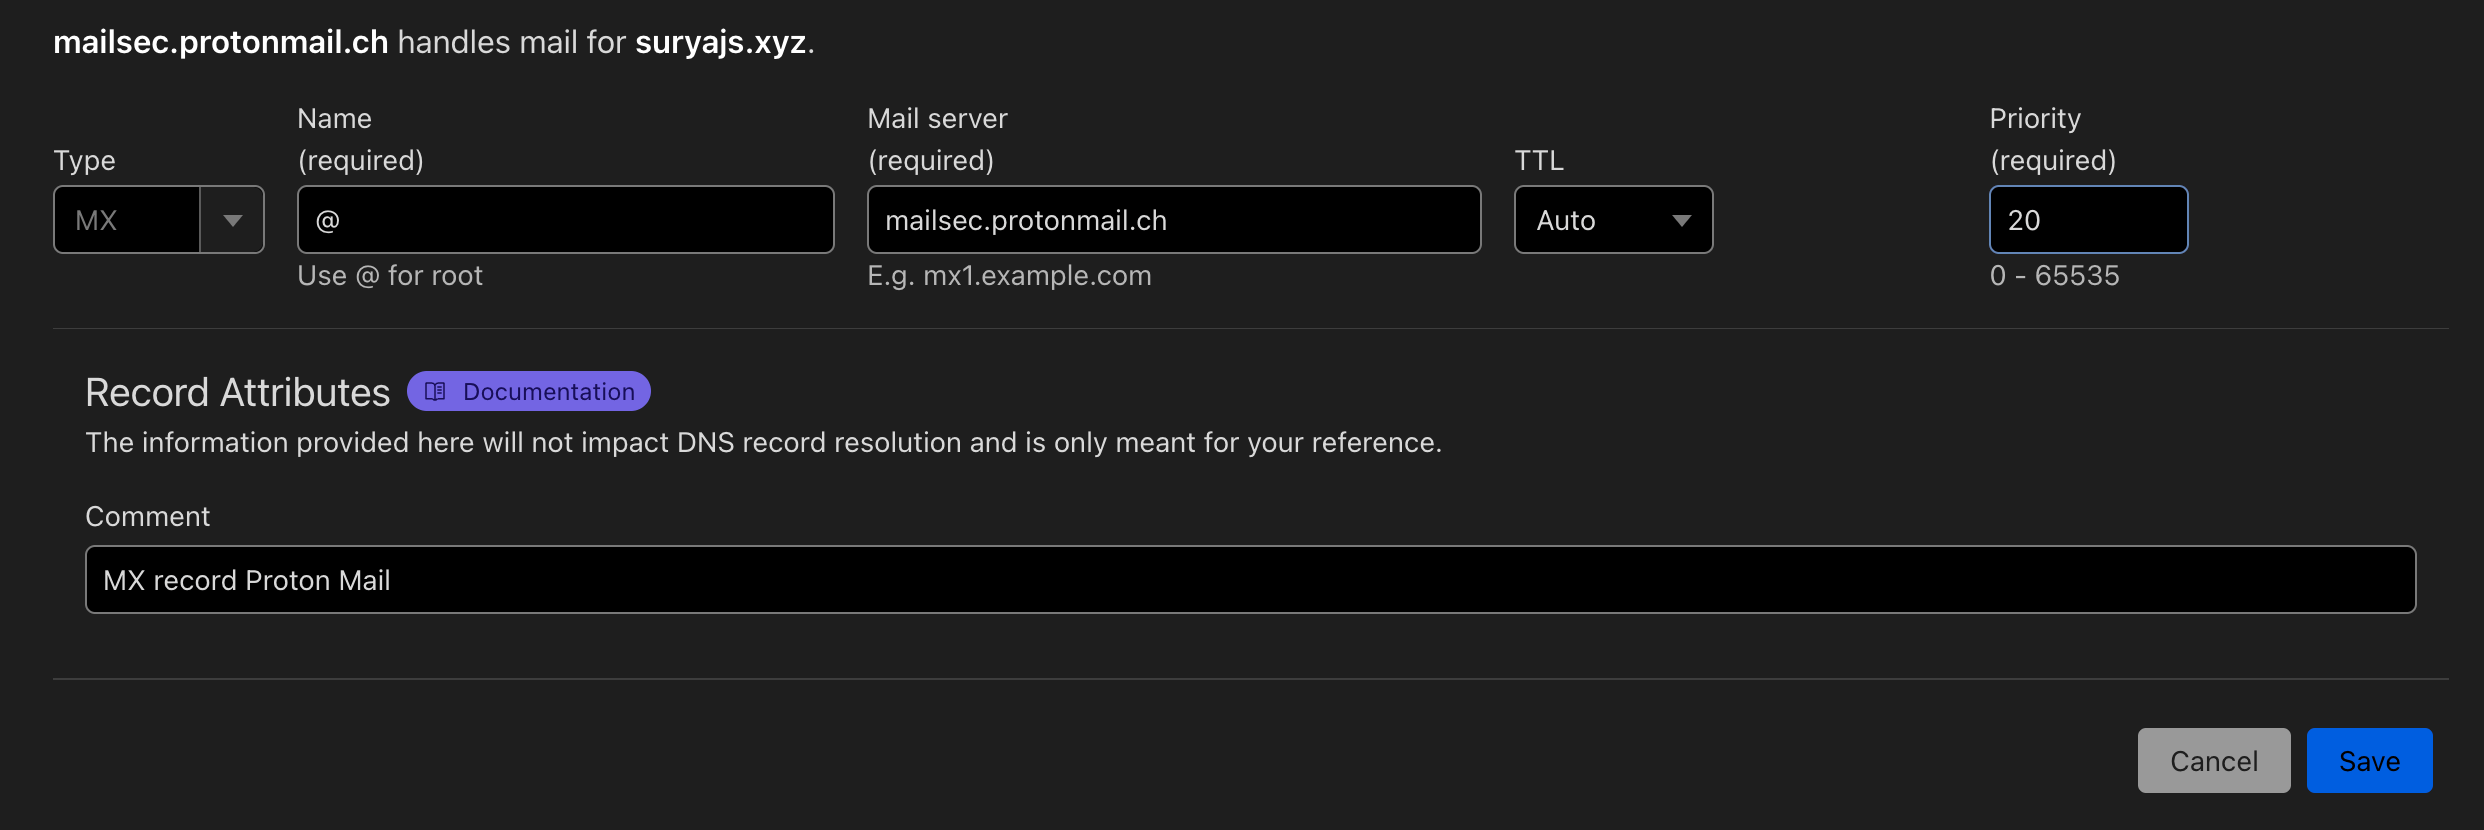
• Save the changes.

3. Add SPF Record
SPF (Sender Policy Framework) records help prevent email spoofing by specifying which mail servers are permitted to send email on behalf of your domain.
• In the DNS settings, add a new record.
• Select TXT Record as the record type.
• Enter the following details:
◦ Host/Name: Use “@” for your root domain.
◦ Value: Enter v=spf1 include:_spf.protonmail.ch ~all
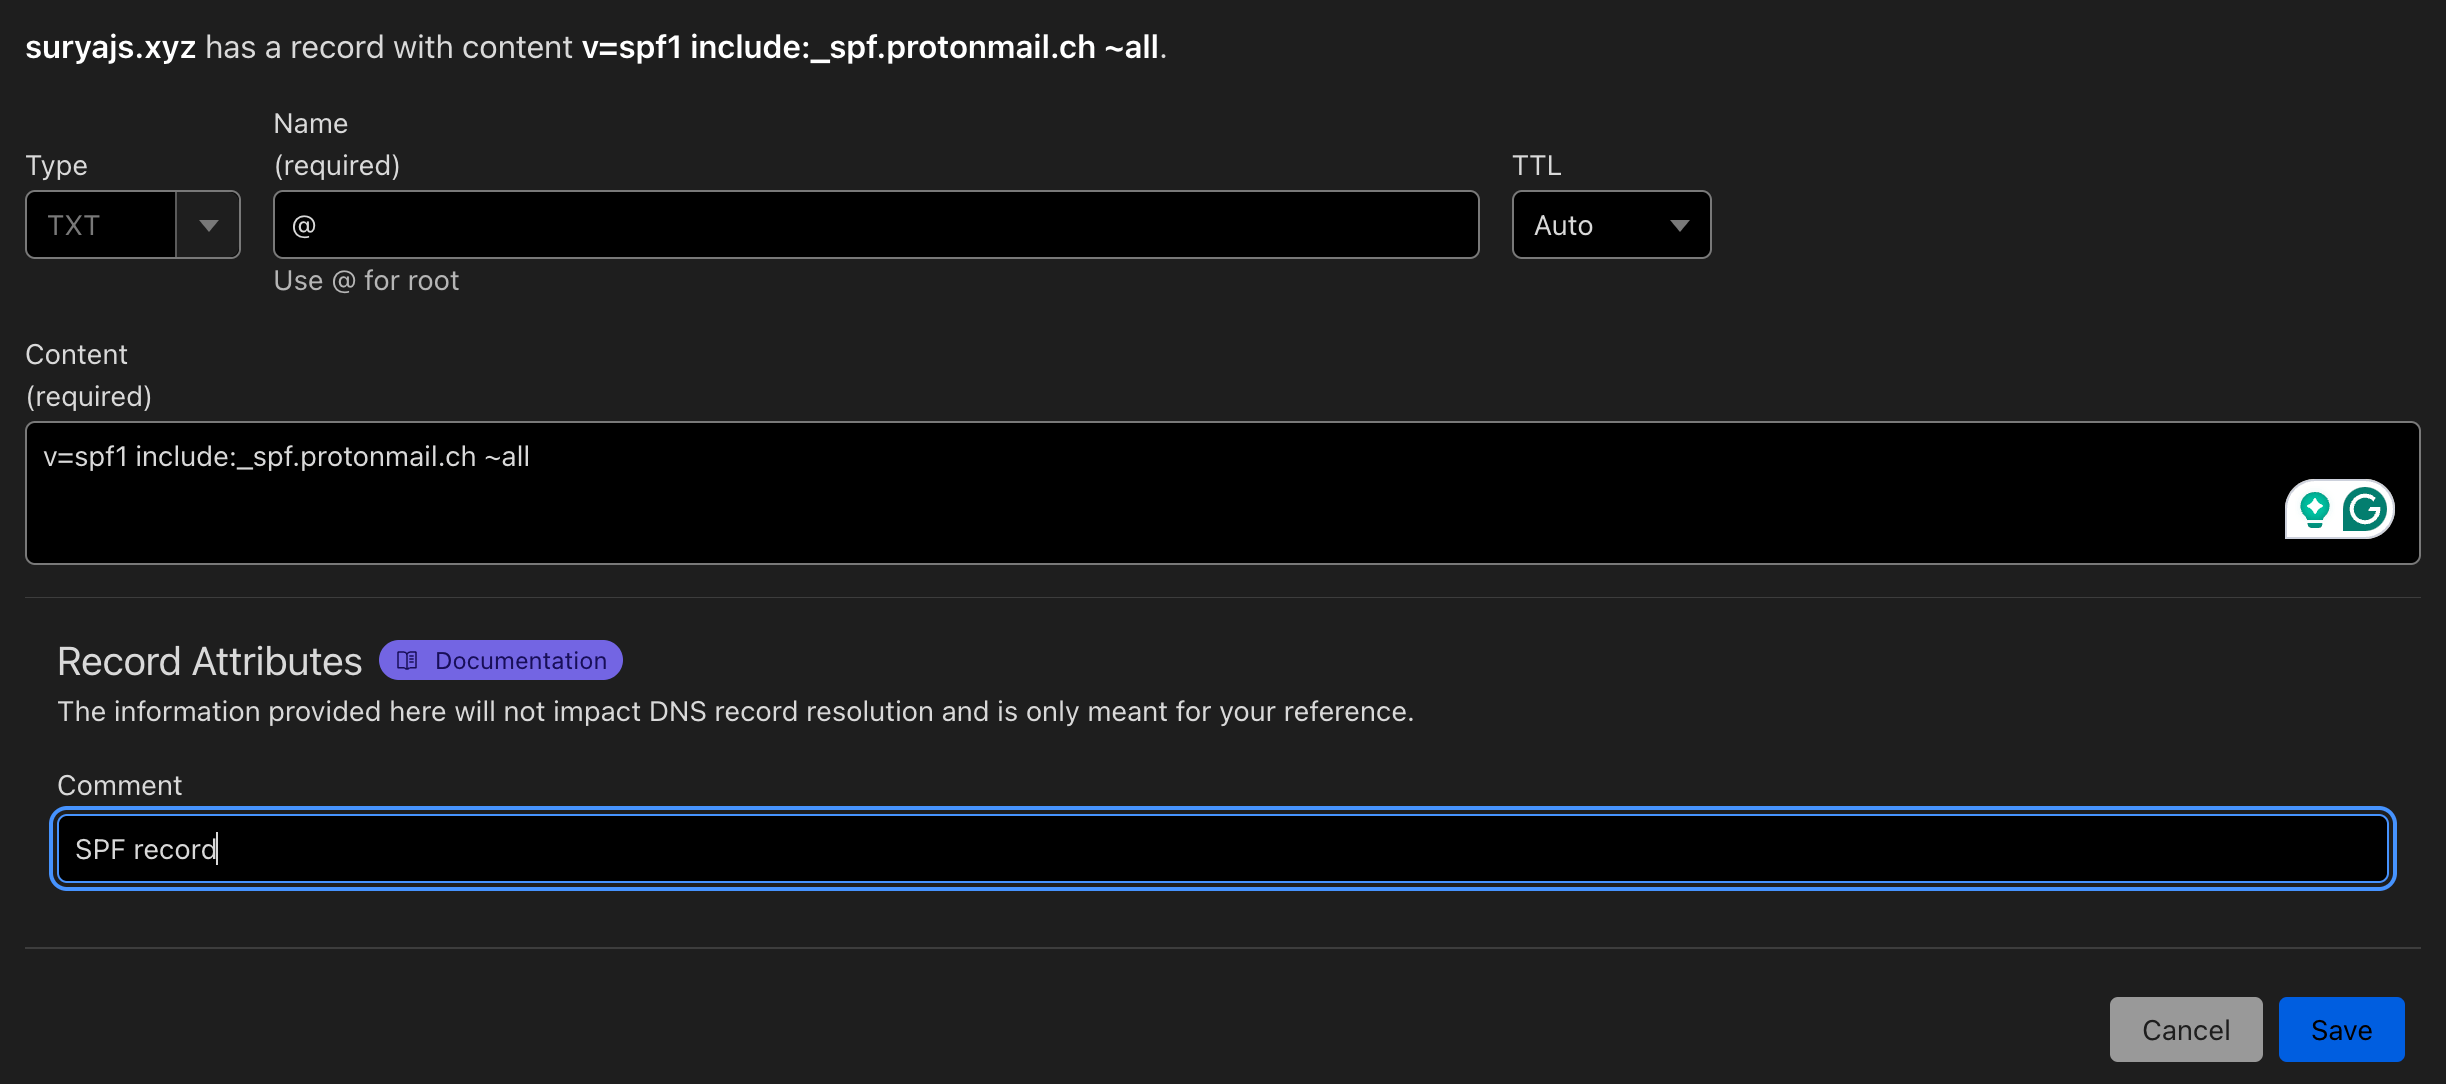
• Save the changes.

4. Add DKIM Record
DKIM (DomainKeys Identified Mail) records add an encrypted signature to your emails, verifying that they were sent by you and haven’t been altered.
• In the Proton Mail settings under your custom domain, you will find the DKIM record information.
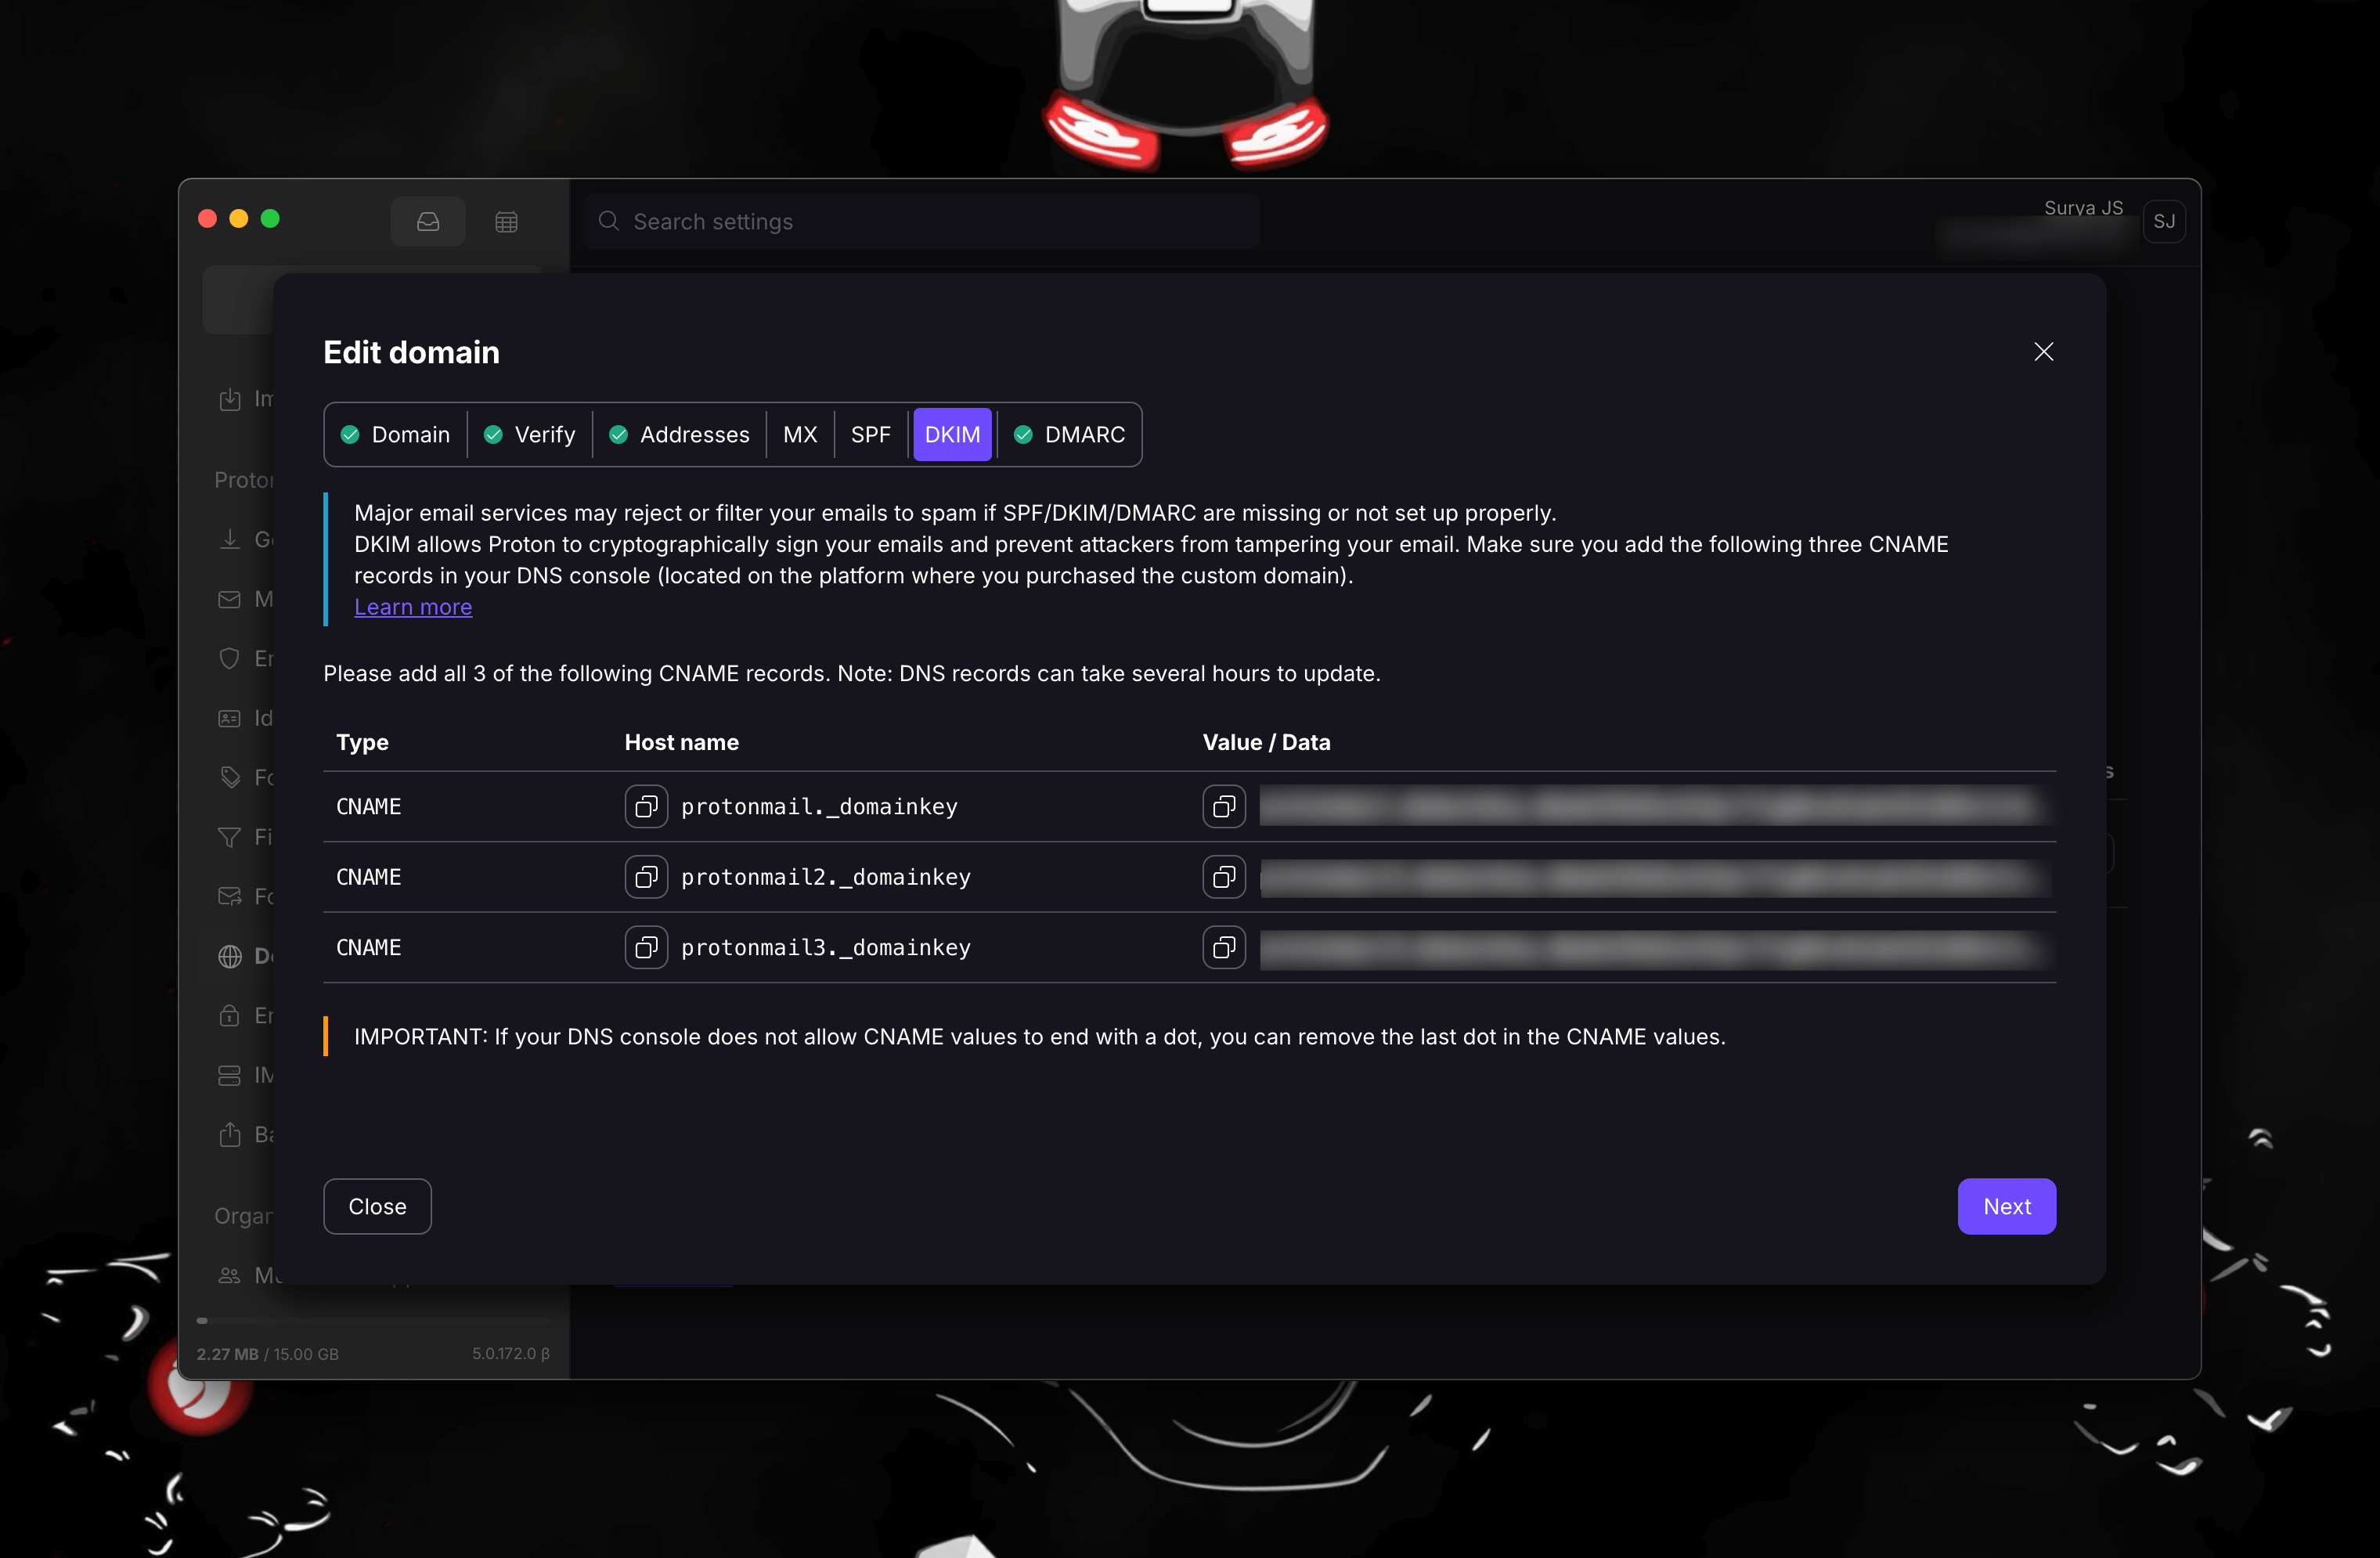
• Add a new record in your DNS settings:
◦ Host/Name: This will be like protonmail.domainkey (Repeat Step 4 for protonmail2.domainkey and protonmail3._domainkey).
◦ Value: Copy the DKIM public key provided by Proton Mail (it will look like a long string of characters).
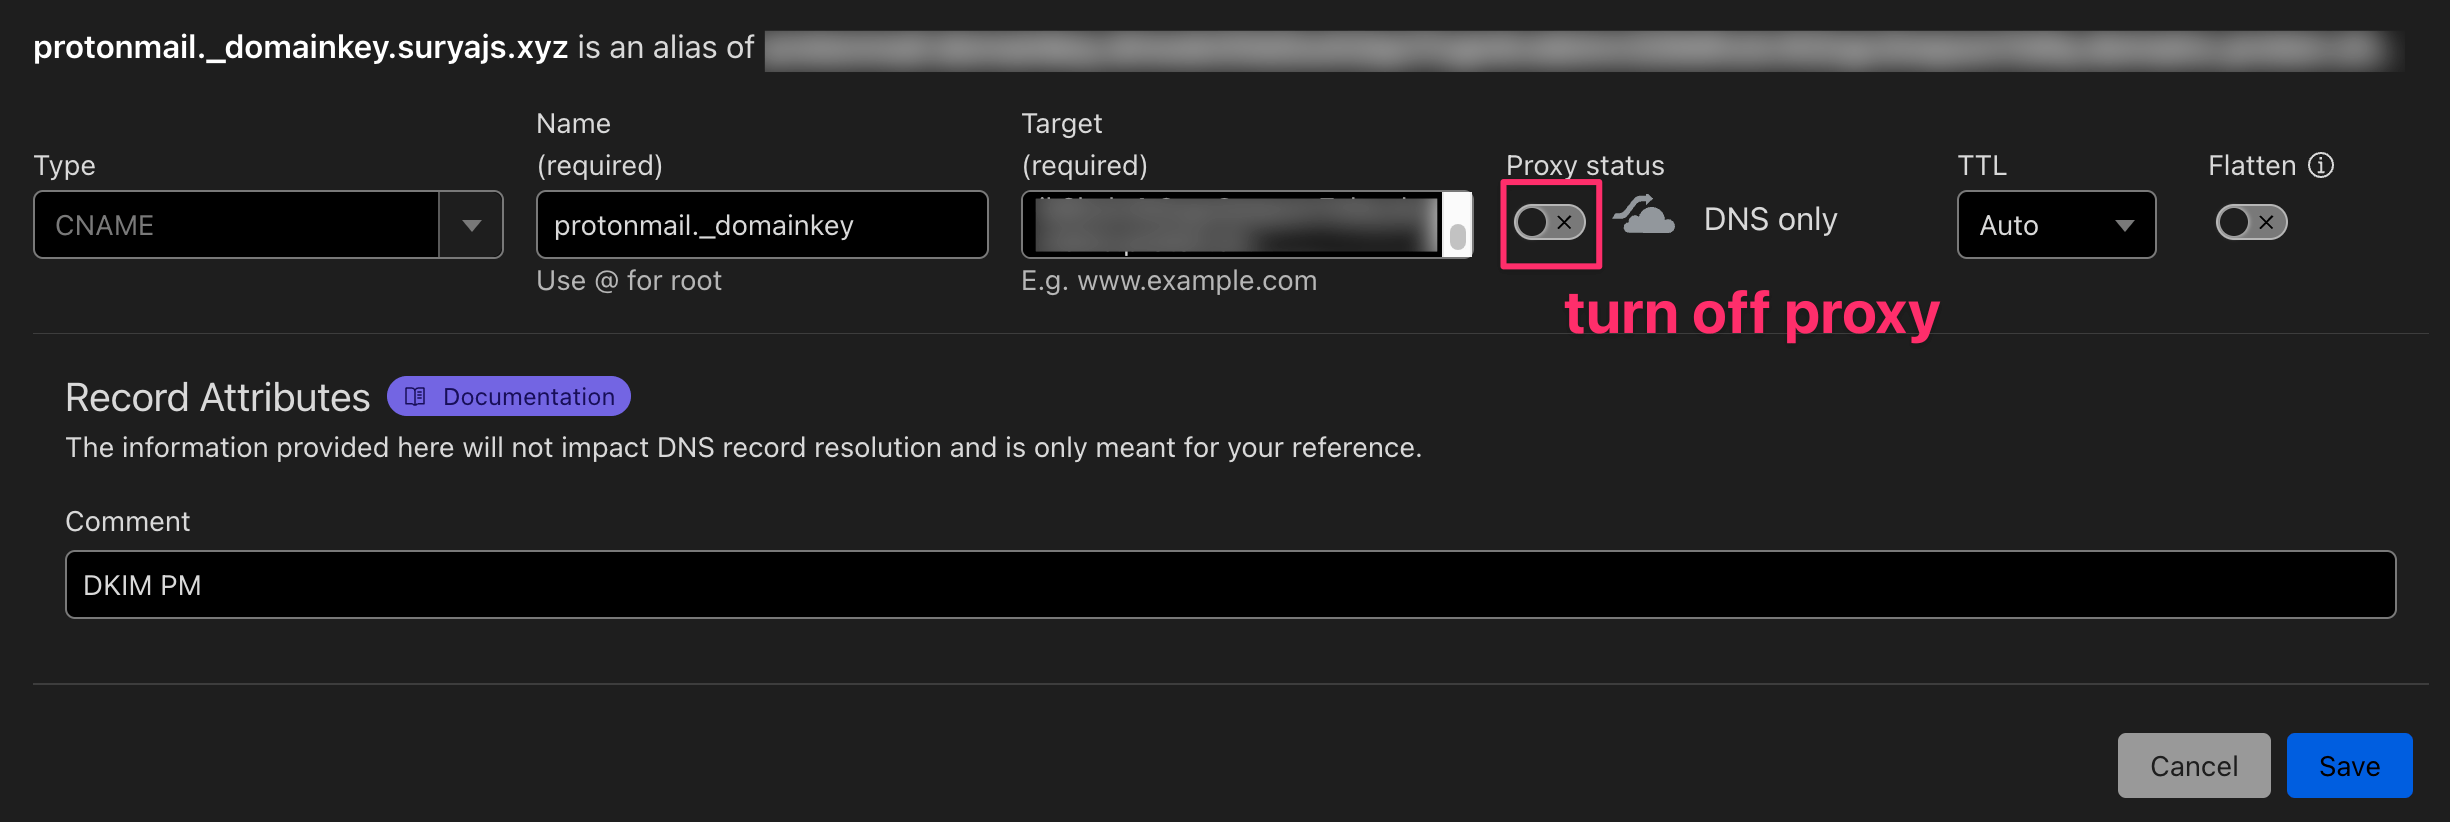
• Save the changes. (MAKE SURE TO TURN OFF PROXY.)

5. Add DMARC Record
DMARC (Domain-based Message Authentication, Reporting & Conformance) records provide instructions to receiving mail servers on how to handle emails that fail SPF or DKIM checks.
• Again, select TXT Record for this entry.
• Enter the following details:
◦ Host/Name: Use _dmarc
◦ Value: Enter v=DMARC1; p=quarantine
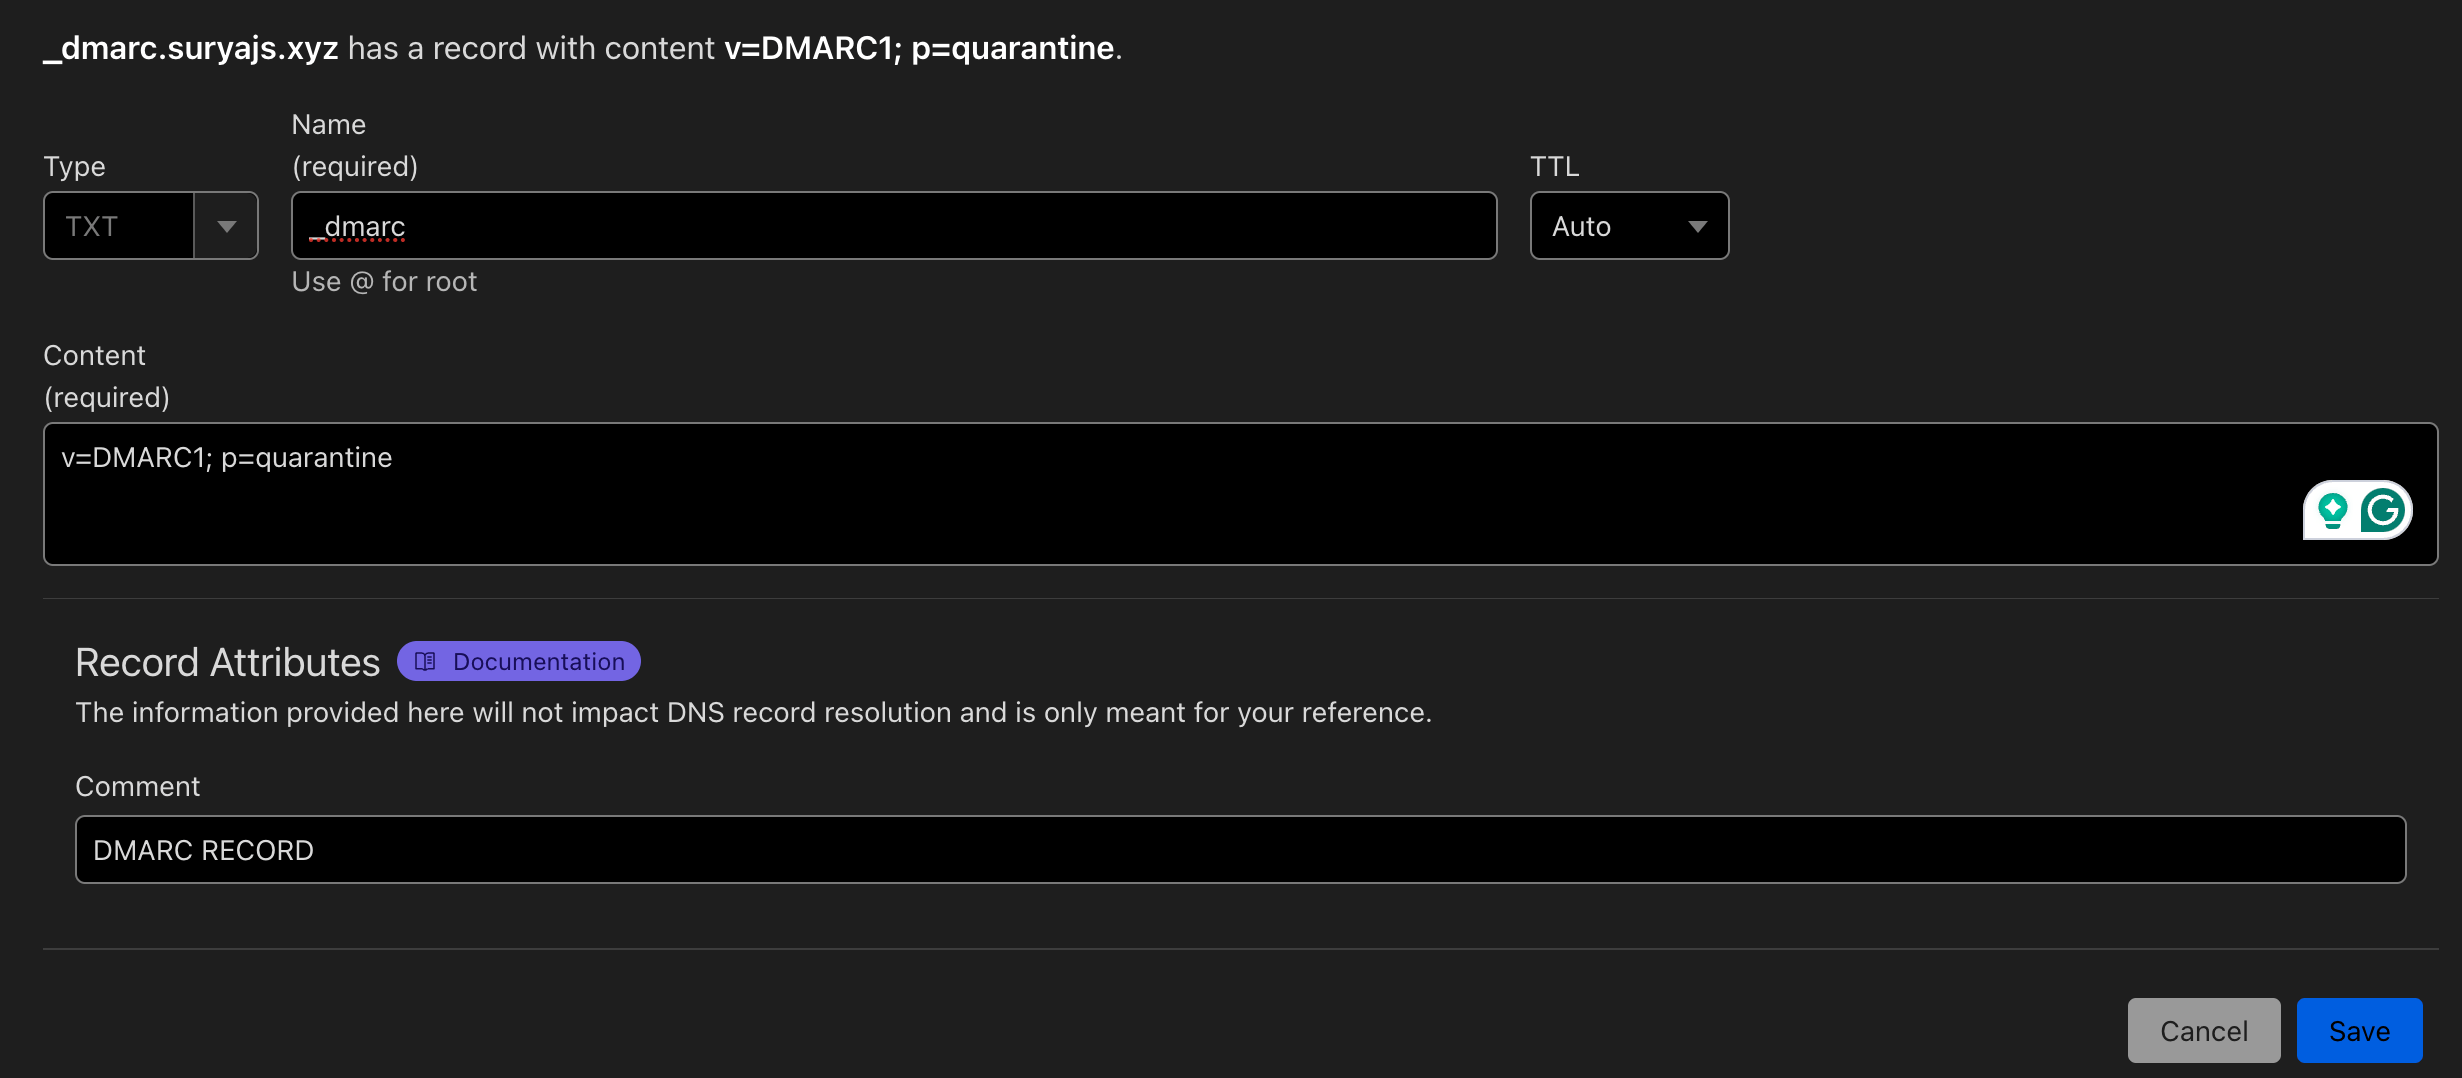
• Save the changes.
6. Allow Time for DNS Propagation
After adding all the DNS records, it may take a few minutes to several hours for the changes to propagate across the internet. During this time, your email settings will not be fully functional.
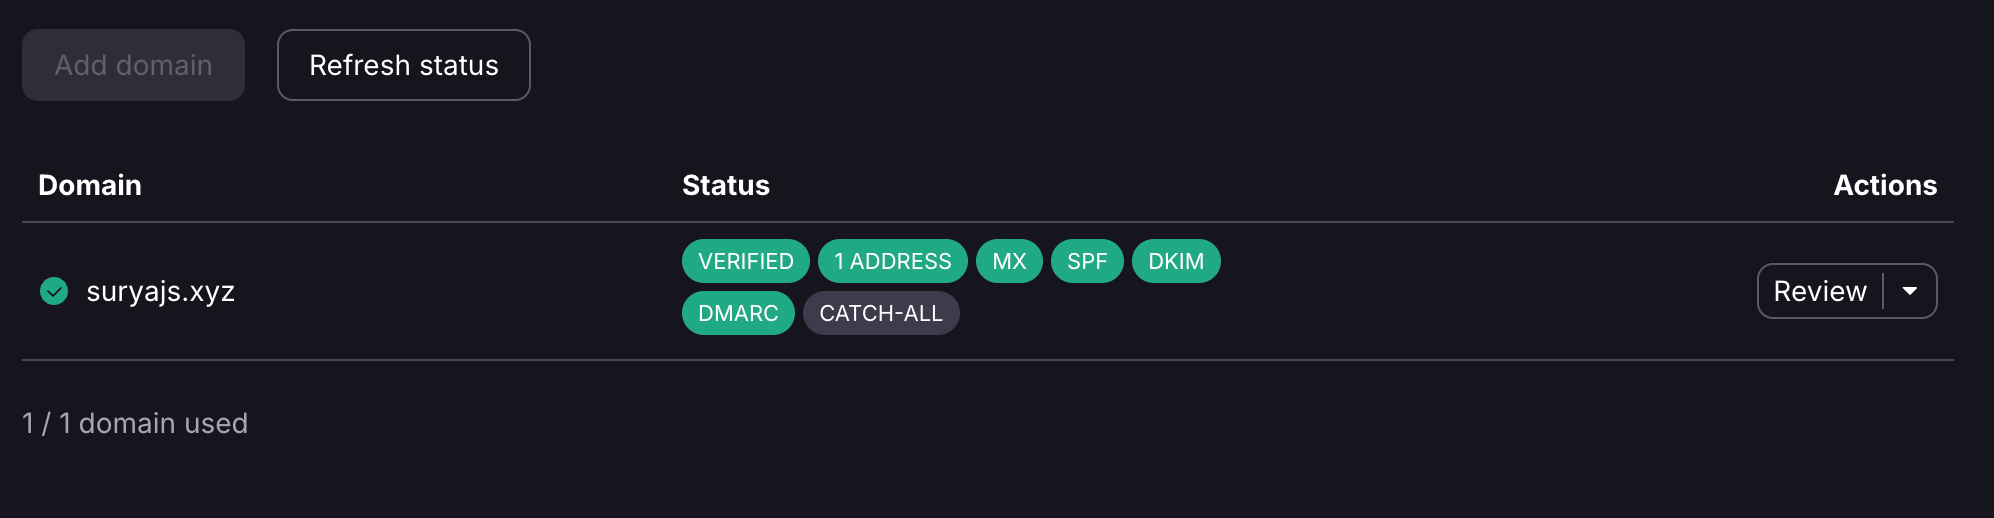
7. Verify DNS Settings in Proton Mail
• Return to your Proton Mail account.
• Go back to the Domains section in Settings.
• Click on your custom domain to check the status of the DNS configurations.
• Proton Mail will confirm if the records are set up correctly. If any records are missing or incorrect, it will indicate what needs to be fixed.
Step 6: Test Your New Email Address
- Send a test email from your new custom domain email address to ensure it’s working correctly.
- Check both sending and receiving capabilities to confirm everything is set up properly.
Conclusion
Setting up a private email address with your custom domain using Proton Mail not only enhances your online privacy but also presents a professional image to your contacts. By following the steps outlined in this guide, you can create a secure email address that meets your needs.
Additional Tips
- Regularly check your domain’s DNS settings to ensure everything is functioning correctly.
- Explore Proton Mail’s features, such as labels and filters, to better organize your inbox.
- Consider enabling two-factor authentication for an added layer of security.
Call to Action
Are you ready to enhance your email privacy? Follow this guide and start using Proton Mail with your custom domain today! Share your experiences or questions in the comments below!
Comments powered by Disqus.